How to Add a Custom Prerequisites to Visual Studio Setup Project
By Tan Lee Published on Jul 13, 2024 20.3K
To add the Microsoft Access Database Engine as a prerequisite in a Visual Studio Setup Project, follow these steps.
By default, you will not be able to find Bootstrapper for Microsoft Access Database Engine in Visual Studio Setup Project.
To create a Bootstrapper for Microsoft Access Database Engine 2016 you can use the Setup Project Visual Studio.
How to Add Microsoft Access Database Engine as Prerequisites in Visual Studio Setup Project
To add the Microsoft Access Database Engine as a prerequisite in a Visual Studio Setup Project, follow these steps.
Open your Visual Studio solution containing the Setup Project, then navigate to the Solution Explorer, find your Setup Project, and double-click on it to open it.
Next, Right-click on your Setup Project in the Solution Explorer and select "Properties" => In the Properties window, navigate to the "Prerequisites" button.
In the Prerequisites dialog box, you will see a list of components that can be distributed with your application.
Choose whether to download the component from the vendor's website or include it as a prerequisite.
Select the installation options according to your requirements, such as whether to install the component if it's already installed on the target computer, then click "OK" to save your changes and close the Prerequisites dialog box.
Finally, Rebuild your Setup Project to incorporate the changes.
A bootstrapper package is a group of directories and files that contain manifest files that describe how the prerequisite should be installed.
How to create custom bootstrapper packages
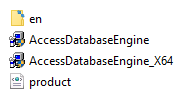
First, You should create a new folder named AccessEngineDatabase, then download and copy the Microsoft Access Database Engine 2016 Redistributable files you downloaded into the folder you created.
Next, Create a product.xml file as shown below.
<?xml version="1.0" encoding="utf-8" ?>
 <Product
  xmlns="http://schemas.microsoft.com/developer/2004/01/bootstrapper"
  ProductCode="Access.Database.Engine.2016"
 >
  <!-- Defines list of files to be copied on build -->
  <PackageFiles CopyAllPackageFiles="true">
   <PackageFile Name="AccessDatabaseEngine.exe" HomeSite="https://download.microsoft.com/download/3/5/C/35C84C36-661A-44E6-9324-8786B8DBE231/AccessDatabaseEngine.exe" />
   <PackageFile Name="AccessDatabaseEngine_x64.exe" HomeSite="https://download.microsoft.com/download/3/5/C/35C84C36-661A-44E6-9324-8786B8DBE231/AccessDatabaseEngine_X64.exe" />
  </PackageFiles>
  <RelatedProducts>
   <DependsOnProduct Code="Microsoft.Net.Framework.2.0" />
  </RelatedProducts>
  <InstallChecks>
       <MsiProductCheck Property="IsInstalled"
         Product="{90160000-00D1-0409-1000-0000000FF1CE}"/>
  </InstallChecks>
  <Commands>
   <Command PackageFile="AccessDatabaseEngine.exe"
      Arguments='/passive'>
    <!-- These checks determine whether the package is to be installed -->
    <InstallConditions>
     <!-- ByPass if the Processor is not x86 -->
     <BypassIf Property="ProcessorArchitecture" Compare="ValueNotEqualTo" Value="Intel"/>
   <!-- ByPass if we have installed -->
     <BypassIf Property="IsInstalled" Compare="ValueGreaterThan" Value="0" />
     <!-- Block install if user does not have admin privileges -->
     <FailIf Property="AdminUser" Compare="ValueEqualTo" Value="false" String="AdminRequired"/>
     <!-- Block install on Win95 -->
     <FailIf Property="Version9x" Compare="VersionLessThan" Value="4.10" String="InvalidPlatformWin9x"/>
     <!-- Block install on NT 4 or less -->
     <FailIf Property="VersionNT" Compare="VersionLessThan" Value="5.00" String="InvalidPlatformWinNT"/>
    </InstallConditions>
    <ExitCodes>
     <ExitCode Value="0" Result="Success"/>
     <ExitCode Value="1641" Result="SuccessReboot"/>
     <ExitCode Value="3010" Result="SuccessReboot"/>
     <DefaultExitCode Result="Fail" FormatMessageFromSystem="true" String="GeneralFailure" />
    </ExitCodes>
   </Command>
<Command PackageFile="AccessDatabaseEngine_x64.exe"
      Arguments='/passive'>
    <!-- These checks determine whether the package is to be installed -->
    <InstallConditions>
     <!-- ByPass if the Processor is not x64 -->
     <BypassIf Property="ProcessorArchitecture" Compare="ValueNotEqualTo" Value="AMD64"/>
   <!-- ByPass if we have installed -->
     <BypassIf Property="IsInstalled" Compare="ValueGreaterThan" Value="0" />
     <!-- Block install if user does not have admin privileges -->
     <FailIf Property="AdminUser" Compare="ValueEqualTo" Value="false" String="AdminRequired"/>
     <!-- Block install on Win95 -->
     <FailIf Property="Version9x" Compare="VersionLessThan" Value="4.10" String="InvalidPlatformWin9x"/>
     <!-- Block install on NT 4 or less -->
     <FailIf Property="VersionNT" Compare="VersionLessThan" Value="5.00" String="InvalidPlatformWinNT"/>
    </InstallConditions>
    <ExitCodes>
     <ExitCode Value="0" Result="Success"/>
     <ExitCode Value="1641" Result="SuccessReboot"/>
     <ExitCode Value="3010" Result="SuccessReboot"/>
     <DefaultExitCode Result="Fail" FormatMessageFromSystem="true" String="GeneralFailure" />
    </ExitCodes>
   </Command>
  </Commands>
 </Product>
You can easily find the product code in your registry HKEY_LOCAL_MACHINE\SOFTWARE\Microsoft\Windows\CurrentVersion\Uninstall
If you want to add a PublicKey to the PackageFile you can find your PublicKey as shown below.
For example: The PublicKey of CrystalReport that you can find in the product.xml file in directory C:\Program Files (x86)\Microsoft SDKs\ClickOnce Bootstrapper\Packages\Crystal Reports for .NET Framework 4.0
<PackageFiles>
    <PackageFile Name="CRRuntime_32bit_13_0_25.msi" HomeSite="http://downloads.businessobjects.com/akdlm/crnetruntime/clickonce/CRRuntime_32bit_13_0_25.msi" PublicKey="3082010a0282010100983af5508e5fab6b8435c79e89ab057f22bb198dcfb6a34c4d4ef8943cb87b035d9eb6209d6bf46fc09c4d8ee13b1aed4a6a6babedb1d3c04ff961d8ab1afd86e2053f245a67a57babd6833cd6e0e17d21f9ecbbda4087cc7f2a421827e8dee15ea7f96f7892b9b1c1bd4c74df32476d96157e5bd7b3df02c023f007c76586bc77427778282e24147170348a41fed70a7547184ea87df8cbc387d59c0479bc3f7ee4ad13da131e85589099911b5a76913d738906a46d6a04995f845b44c3b4bbeb5930c0e7d9e215d36ec20604aaa674cbefdb42ea3ea91ebcf4a39791145a91689b815a52ba652c88fd292833424e2b61e9cca154f591e1037eb63eb26662a50203010001"/>
    <PackageFile Name="CRRuntime_64bit_13_0_25.msi" HomeSite="http://downloads.businessobjects.com/akdlm/crnetruntime/clickonce/CRRuntime_64bit_13_0_25.msi" PublicKey="3082010a0282010100983af5508e5fab6b8435c79e89ab057f22bb198dcfb6a34c4d4ef8943cb87b035d9eb6209d6bf46fc09c4d8ee13b1aed4a6a6babedb1d3c04ff961d8ab1afd86e2053f245a67a57babd6833cd6e0e17d21f9ecbbda4087cc7f2a421827e8dee15ea7f96f7892b9b1c1bd4c74df32476d96157e5bd7b3df02c023f007c76586bc77427778282e24147170348a41fed70a7547184ea87df8cbc387d59c0479bc3f7ee4ad13da131e85589099911b5a76913d738906a46d6a04995f845b44c3b4bbeb5930c0e7d9e215d36ec20604aaa674cbefdb42ea3ea91ebcf4a39791145a91689b815a52ba652c88fd292833424e2b61e9cca154f591e1037eb63eb26662a50203010001"/>
  </PackageFiles>
Right-clicking on setup file, then select Properties
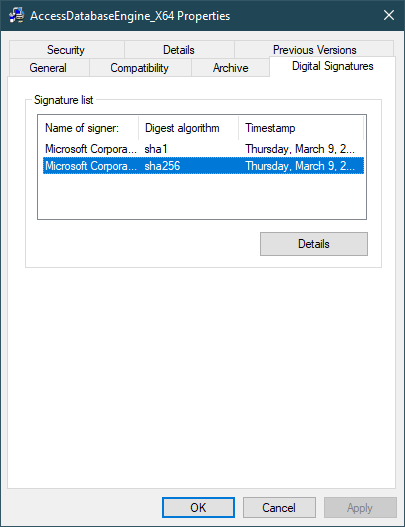
Select Digital Signatures tab, then click the Details button.
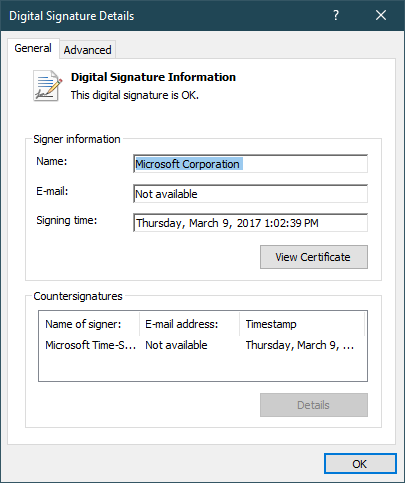
Clicking the View Certificate button.
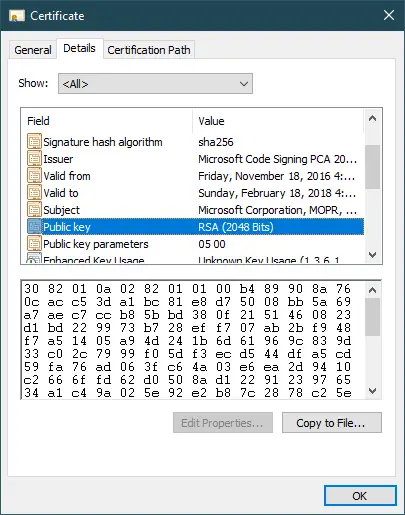
Select the Details tab, then you can see the public key.
Finally, create a new directory named en, then create a package.xml file as shown below.
<?xml version="1.0" encoding="utf-8" ?>
 <Package
  xmlns="http://schemas.microsoft.com/developer/2004/01/bootstrapper"
  Name="DisplayName"
  Culture="Culture">
  <!-- Defines a localizable string table for error messages and url's -->
  <Strings>
   <String Name="DisplayName">Microsoft Access Database Engine 2016</String>
   <String Name="Culture">en</String>
   <String Name="DotNetFxRequired">Installation of Microsoft Access Database Engine 2016 requires Microsoft .NET Framework 2.0. Contact your application vendor.</String>
   <String Name="InvalidPlatformWin9x">Installation of Microsoft Access Database Engine 2016 is not supported on Windows 95. Contact your application vendor.</String>
   <String Name="InvalidPlatformWinNT">Installation of Microsoft Access Database Engine 2016 is not supported on Windows NT 4.0. Contact your application vendor.</String>
   <String Name="GeneralFailure">A fatal error occurred during the installation of Microsoft Access Database Engine 2016.</String>
   <String Name="AdminRequired">You do not have the permissions required to install this application. Please contact your administrator.</String>
  </Strings>
 </Package>
You need to Copy the original directory to C:\Program Files (x86)\Microsoft SDKs\ClickOnce Bootstrapper\Packages if you are using 64 bit windows or C:\Program Files\Microsoft SDKs\ClickOnce Bootstrapper\Packages
Right-clicking on your setup project, then select Properties.
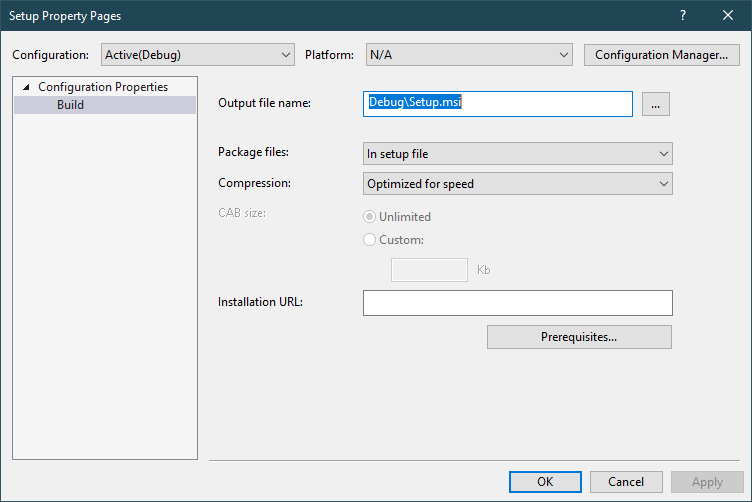
Clicking the Prerequisites button, then you can see your custom bootstrapper automatically added to the prerequisites dialogbox.
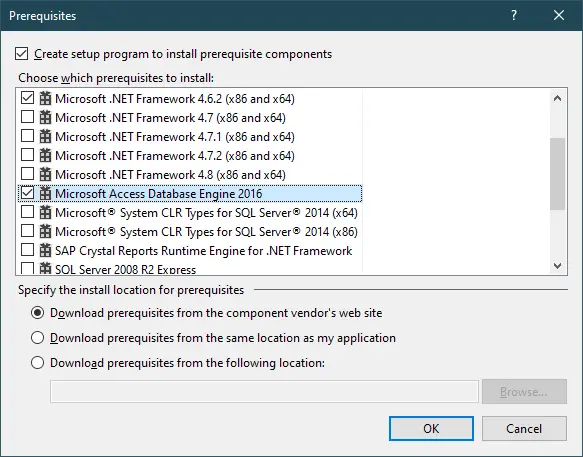
Select all prerequisites, then click OK button and rebuild your project.
VIDEO TUTORIAL
- How to Share a file between multiple projects in Visual Studio
- How to add .gitignore in Visual Studio
- How to set multiple startup projects in Visual Studio
- How to fix 'NonComVisibleBaseClass was detected'
- How to Auto Increment Version Number in Visual Studio
- The referenced component could not be found
- How to Auto increment version in Visual Studio
- Starting the Visual Studio Debugger When Attach to Process Doesn’t Work
Categories
Popular Posts

Structured Data using FoxLearn.JsonLd
Jun 20, 2025

Implement security headers for an ASP.NET Core
Jun 24, 2025


What Are RESTful Web Services?
Feb 19, 2024

Plus Admin Dashboard Template
Nov 18, 2024