How to Create a simple TCP/IP chat application in C#
By Tan Lee Published on Jul 16, 2024 87.86K
TCP/IP is one of the foundational communication protocols used for networking, enabling reliable data exchange between systems. In this article, we’ll explore how to create a simple TCP/IP chat application using the SimpleTCP library in C#.
SimpleTCP is simple and straightforward library for TCP client and servers. It's extremely useful for reading/writing with line-by-line command interfaces. Supports binary and string messages, automatic string trimming, and end-of-message delimiter (newline by default).
This is a simple example of a TCP/IP client-server application using the SimpleTCP library in C# Windows Forms.
Open your Visual Studio, then click New Project, then select Visual C# on the left, then Windows and then select Windows Forms Application. Enter your project name and then click OK button.
Next, You need to install the SimpleTCP library by right-clicking on your project select Manage NuGet Packages -> Search simpletcp -> Install
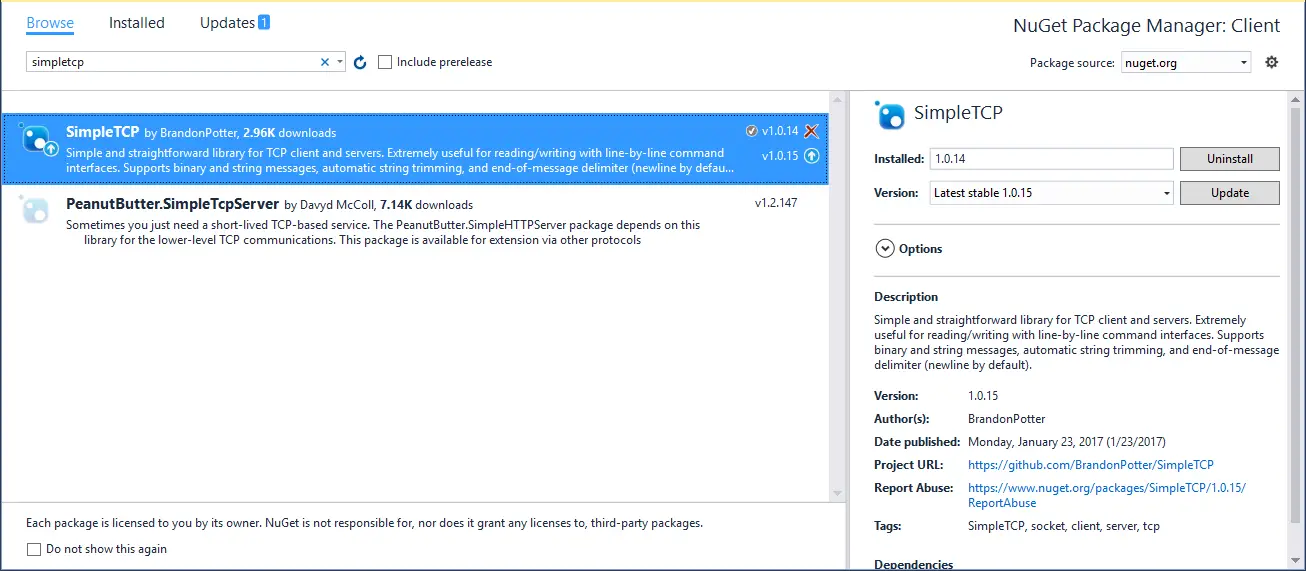
You can also do this via NuGet Package Manager Console by running the following command
Install-Package SimpleTCP
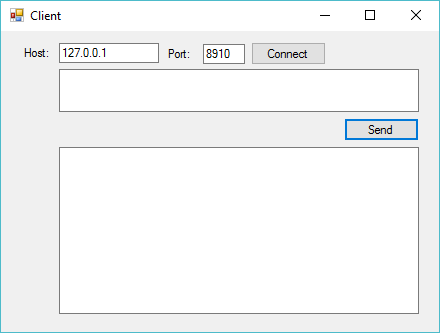
Open your form designer, then design a client form that allows you to send messages to the server. You can layout your TCP Client form as shown below.
C# TCP Client Application
Drag and drop the Label, TextBox, Button controls from the Visual Studio toolbox onto your form designer, then you can layout your form as shown below.
C# TCP Server Application
Do the same way for TCP Server form.
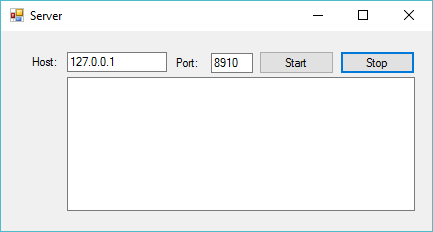
You should change the host and port to connect over the network, through the network you should open the firewall to allow connection to your port.
For example, c# tcp client chat
Double-click the client form, then add a Form_Load event handler that allows you to initialize SimpleTcpClient.
// c# tcp ip client example
SimpleTcpClient client;

// tcp ip c# windows form
// c# tcpclient
private void Form1_Load(object sender, EventArgs e)
{
    // c# tcp server tcp/ip
    client = new SimpleTcpClient();
    client.StringEncoder = Encoding.UTF8;
    // tcp c# chat client
    client.DataReceived += Client_DataReceived;
}
If you want a TCP client that connects to 127.0.0.1 on port 8910
//  c# server client tcp
var client = new SimpleTcpClient().Connect("127.0.0.1", 8910);
Double-click on the Connet button, then add a Click event handler that allows you to connect to 127.0.0.1 via 8910 port.
// c# tcp client example
private void btnConnect_Click(object sender, EventArgs e)
{
    btnConnect.Enabled = false;
    //Connect to server
    client.Connect(txtHost.Text, Convert.ToInt32(txtPort.Text));
}
You need to handle the DataReceived event allow you to add text to the textbox control.
// c# tcp windows ip
private void Client_DataReceived(object sender, SimpleTCP.Message e)
{
    //Update message to txtStatus
    txtStatus.Invoke((MethodInvoker)delegate ()
    {
        txtStatus.Text += e.MessageString;
    });
}
Double-click on the Send button, then add a Click event handler allows you to send data to server.
// c# send tcp message
private void btnSend_Click(object sender, EventArgs e)
{
    // Send message to the server
    client.WriteLineAndGetReply(txtMessage.Text, TimeSpan.FromSeconds(3));
}
We will send the message from textbox control to the server and get the reply that it sends within 3 seconds.
Open your server form, then handle code allows you to receive message from client.
For example, c# tcp server chat
Double-click on the server form, then add a Form_Load event handler. We will initialize SimpleTcpServer
// c# tcp server windows
SimpleTcpServer server;
// c# tcpserver initialize
private void Form1_Load(object sender, EventArgs e)
{
   // tcp c# server example
    server = new SimpleTcpServer(); // tcp c# server client
    server.Delimiter = 0x13;//enter
    server.StringEncoder = Encoding.UTF8;
    server.DataReceived += Server_DataReceived;
}
StringEncoder use to change the text encoding that the client and server uses when sending and receiving strings.
If you want a TCP server that listens on port 8910 on all the IP addresses on the machine you can use snippet below.
//  tcp c# server tcpserver
var server = new SimpleTcpServer().Start(8910);
Double-click on the Start button, then add a Click event handler allows you to listens via IP and Port that you enter from textbox control
// tcp server c#
private void btnStart_Click(object sender, EventArgs e)
{
    //Start server host
    txtStatus.Text += "Server starting...";
    System.Net.IPAddress ip = System.Net.IPAddress.Parse(txtHost.Text);
    server.Start(ip, Convert.ToInt32(txtPort.Text));
}
Double-click on the Stop button, then add a Click event handler that allows you to stop listening.
// c# tcp server simple
private void btnStop_Click(object sender, EventArgs e)
{
    if (server.IsStarted)
        server.Stop();
}
You can also handle DataReceived event from server form allows you to reply message to client.
// c# tcp methodinvoker server
private void Server_DataReceived(object sender, SimpleTCP.Message e)
{
    //Update mesage to txtStatus
    txtStatus.Invoke((MethodInvoker)delegate ()
    {
        txtStatus.Text += e.MessageString;
        e.ReplyLine(string.Format("You said: {0}", e.MessageString));
    });
}
If you want to get the IP addresses that the server is listening on you can use the GetListeningIPs method.
var listeningIps = server.GetListeningIPs();
Or you want to get only the IPv4 addresses the server is listening on.
var listeningV4Ips = server.GetListeningIPs().Where(ip => ip.AddressFamily == System.Net.Sockets.AddressFamily.InterNetwork);
And if you want to know how many clients are connected to the server you can use the ConnectedClientsCount property.
int clientsConnected = server.ConnectedClientsCount;
So you have completed the tcp ip c# example using SimpleTCP library.
Now, you can run your server application and client application separately to test the chat functionality.
VIDEO TUTORIAL


