ASP.NET MVC: Smart Login Form Responsive
By Tan Lee Published on May 29, 2017 24.07K
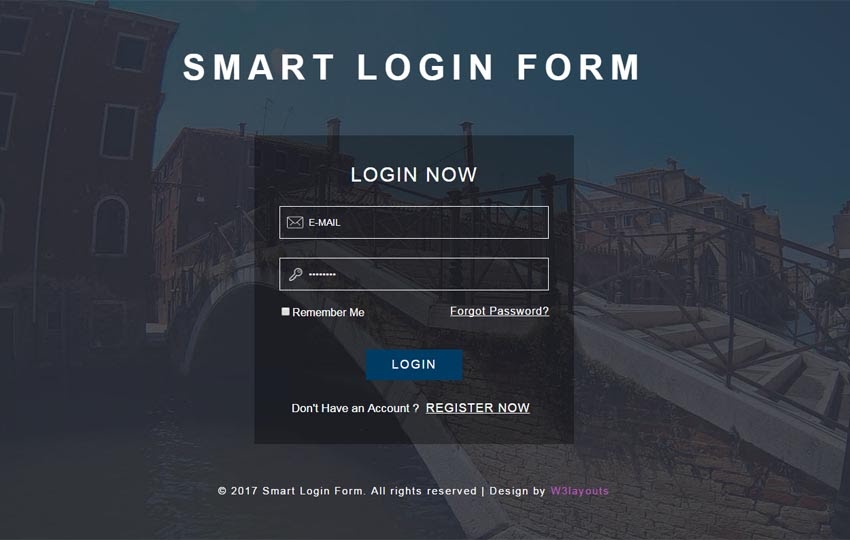
How to Create a Login with Smart Login Form Responsive in ASP.NET Identity MVC 5 using C#, Entity Framework Code First
Step 1: Download Smart Login Form Responsive Widget Template
 Step 2: Open AccountController, then create a SmartLogin action as below
//
// GET: /Account/Login
[AllowAnonymous]
public ActionResult SmartLogin(string returnUrl)
{
    ViewBag.ReturnUrl = returnUrl;
    return View();
}

//
// POST: /Account/Login
[HttpPost]
[AllowAnonymous]
[ValidateAntiForgeryToken]
public async Task<ActionResult> SmartLogin(LoginViewModel model, string returnUrl)
{
    if (!ModelState.IsValid)
    {
        return View(model);
    }

    // This doesn't count login failures towards account lockout
    // To enable password failures to trigger account lockout, change to shouldLockout: true
    var result = await SignInManager.PasswordSignInAsync(model.Email, model.Password, model.RememberMe, shouldLockout: false);
    switch (result)
    {
        case SignInStatus.Success:
            return RedirectToLocal(returnUrl);
        case SignInStatus.LockedOut:
            return View("Lockout");
        case SignInStatus.RequiresVerification:
            return RedirectToAction("SendCode", new { ReturnUrl = returnUrl, RememberMe = model.RememberMe });
        case SignInStatus.Failure:
        default:
            ModelState.AddModelError("", "Invalid login attempt.");
            return View(model);
    }
}
Step 3: Right click on SmartLogin action, then create a SmartLogin view as below
@using MvcDemo.Models
@model LoginViewModel
@{
Layout = null;
}
<!DOCTYPE html>
<html lang="en">
<head>
<title>Smart Login Form Responsive Widget Template:: W3layouts</title>
<!-- Meta tag Keywords -->
<meta name="viewport" content="width=device-width, initial-scale=1">
<meta http-equiv="Content-Type" content="text/html; charset=utf-8" />
<meta name="keywords" content="Smart Login Form Responsive Widget,Login form widgets, Sign up Web forms , Login signup Responsive web form,Flat Pricing table,Flat Drop downs,Registration Forms,News letter Forms,Elements" />
<script type="application/x-javascript">
addEventListener("load", function() { setTimeout(hideURLbar, 0); }, false);
function hideURLbar(){ window.scrollTo(0,1); } </script>
<!-- Meta tag Keywords -->
<!-- css files -->
<link href="/smartlogin/css/style.css" rel="stylesheet" type="text/css" media="all">
<!-- online-fonts -->
<link href="//fonts.googleapis.com/css?family=Roboto+Slab:100,300,400,700Roboto:100,100i,300,300i,400,400i,500,500i,700,700i,900,900iSlabo+27px&subset=cyrillic,cyrillic-ext,greek,greek-ext,latin-ext,vietnamese" rel="stylesheet">
<!--//online-fonts -->
</head>
<body>
<!--header-->
<div class="agileheader">
<h1>Smart Login Form</h1>
</div>
<!--//header-->
<!--main-->
<div class="main-w3l">
<div class="w3layouts-main">
<h2>Login Now</h2>
@using (Html.BeginForm("SmartLogin", "Account", new { ReturnUrl = ViewBag.ReturnUrl }, FormMethod.Post, new { @class = "form-horizontal", role = "form" }))
{
@Html.AntiForgeryToken()
@Html.ValidationSummary(true, "", new { @class = "text-danger" })
<div class="form-group">
@Html.TextBoxFor(m => m.Email, new { @class = "form-control", @placeholder = "E-Mail", @type = "email" })
@Html.ValidationMessageFor(m => m.Email, "", new { @class = "text-danger" })
</div>
<div class="form-group">
@Html.PasswordFor(m => m.Password, new { @class = "form-control", @placeholder = "Password" })
@Html.ValidationMessageFor(m => m.Password, "", new { @class = "text-danger" })
</div>
<h6><a href="#">Forgot Password?</a></h6>
<div class="clear"></div>
<span>@Html.CheckBoxFor(m => m.RememberMe)Remember Me</span>
<input type="submit" value="login" name="login">
}
<p>Don't Have an Account ?<a href="#">Register Now</a></p>
</div>
</div>
<!--//main-->
<!--footer-->
<div class="footer-w3l">
<p>© 2017 Smart Login Form. All rights reserved | Design by <a href="http://w3layouts.com">W3layouts</a></p>
</div>
<!--//footer-->
</body>
</html>VIDEO TUTORIALS
- ASP.NET MVC Responsive Templates Free Download
- How to upload file in ASP.NET MVC
- How to Create Contact Form Flat Responsive in ASP.NET MVC
- How to check if HttpPostedFileBase is an image
- How to upload Multiple File in ASP.NET MVC
- ASP.NET MVC: Implement Password Reset with ASP NET Identity
- ASP.NET MVC: Getting Started
- ASP.NET MVC: Create Custom Routes
Categories
Popular Posts

Structured Data using FoxLearn.JsonLd
Jun 20, 2025

Implement security headers for an ASP.NET Core
Jun 24, 2025

Modular Admin Template
Nov 14, 2024

SB Admin Template
Nov 14, 2024

Carpatin Admin Dashboard Template
Nov 15, 2024