ASP.NET: How to Create ASP.NET Web Form in Visual Studio 2019
By Tan Lee Published on Sep 17, 2020 19.81K
This post shows you How to Create ASP.NET Web Form in Visual Studio 2019.
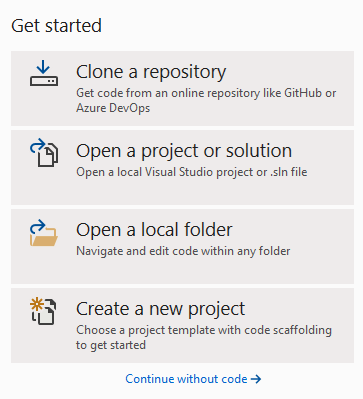
Start Visual Studio 2019 and click 'Create a new project'.
How to Create ASP.NET Web Application in Visual Studio 2019
How do I create a Web form in Visual Studio
Another way, Start Visual Studio, on the File menu select New, and then select Project.
You will see below screenshot.
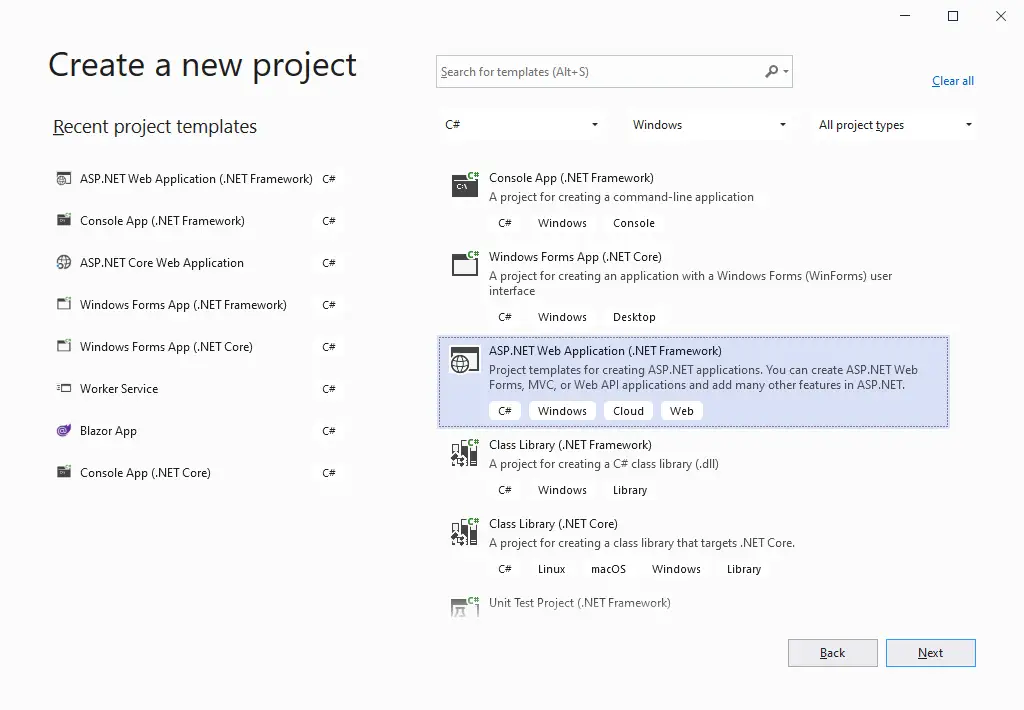
Selecting ASP.NET Web Application (.NET Framework).
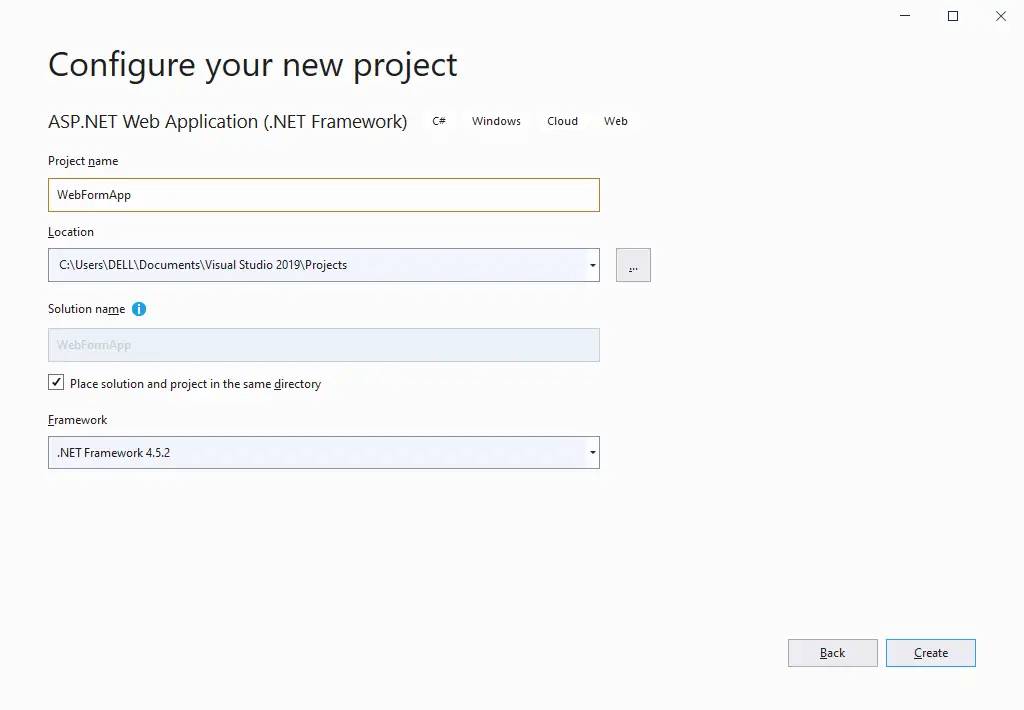 Entering your project name, then select your framework target.
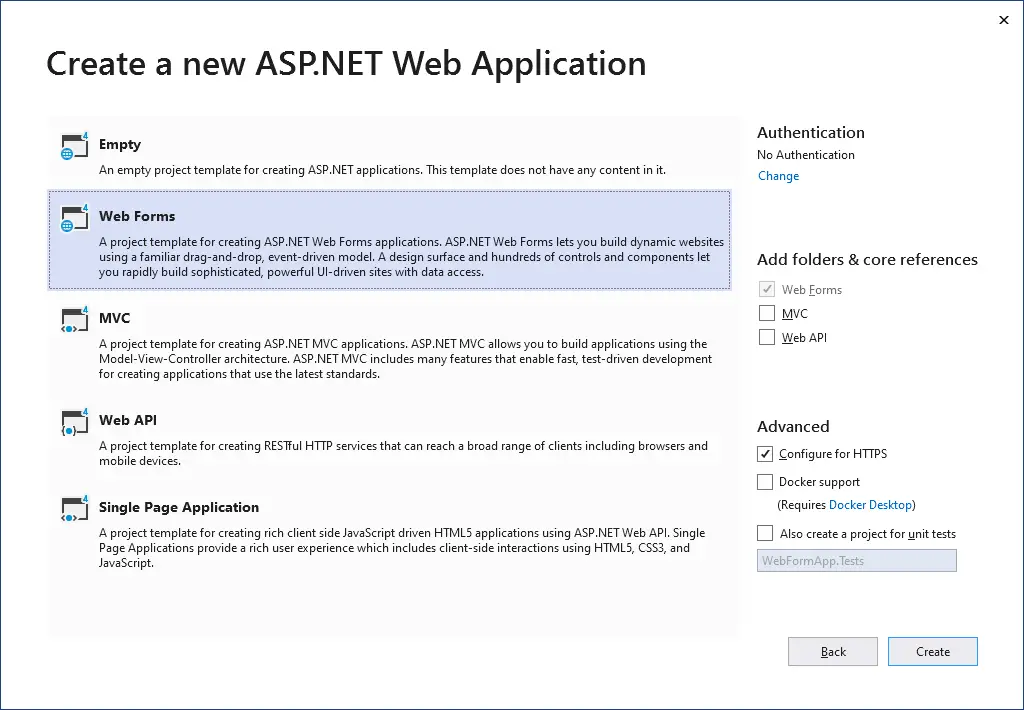
Selecting Web Forms template, if you want to combine Web Api or MVC you can check it under Add Folders.
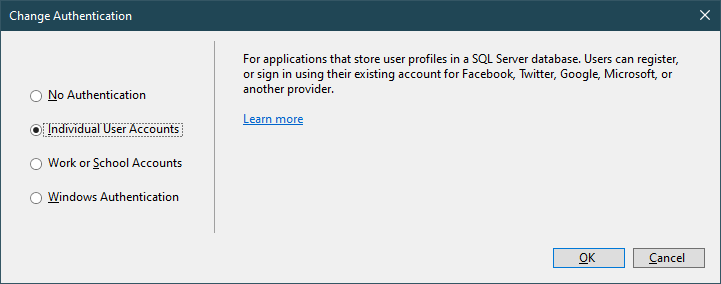
If you want to use ASP.NET Identity you can click the Change link at Authentication, then select the type you want to use.
Clicking Create button to finish create ASP.NET Web Form in Visual Studio 2019.
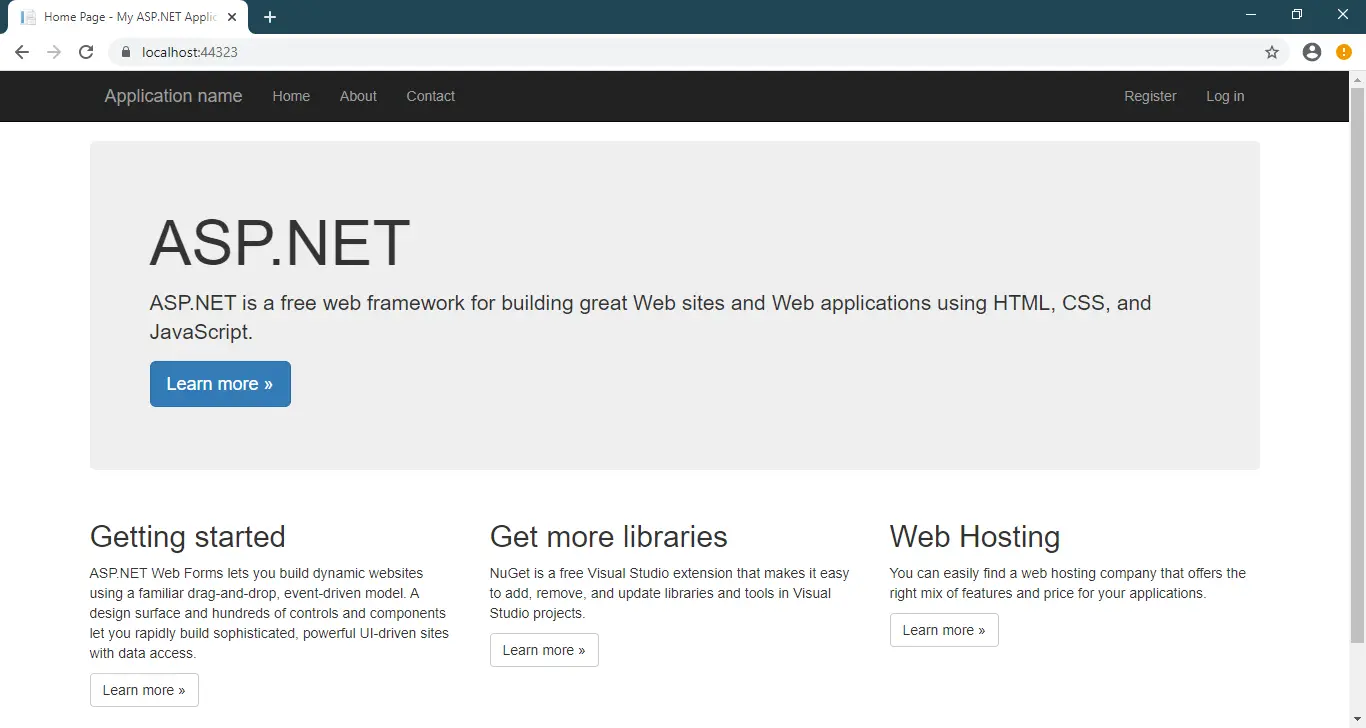
Press F5 to run your project.
In the scope of this article, I just guide you how to create an asp.net web form in visual studio 2019 project. I will guide you on how to build a web site in another article.
Categories
Popular Posts

Implement security headers for an ASP.NET Core
Jun 24, 2025

Structured Data using FoxLearn.JsonLd
Jun 20, 2025


RuangAdmin Template
Nov 13, 2024

Material Lite Admin Template
Nov 14, 2024