How to Install SQL Server 2017
By Tan Lee Published on Jun 26, 2024 3.4K
First, You need to visit Microsoft's official SQL Server 2017 download page or directly link, then choose between Developer, Express, Evaluation, Web, Standard, or Enterprise editions. Click on the edition you need.
How to Download and Install SQL Server?
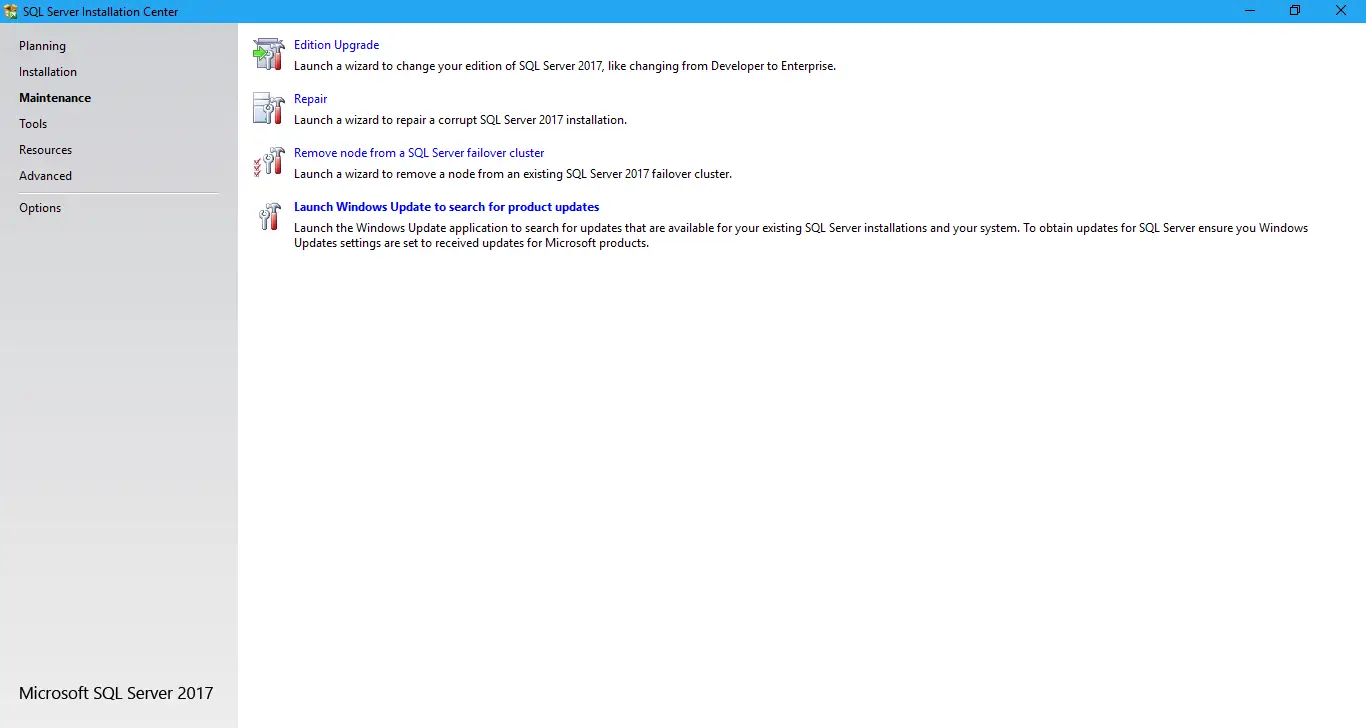
After you finish downloading the file, you need to choose to download the file to your computer, then run the setup.exe file to start the SQL Server Installation Center.
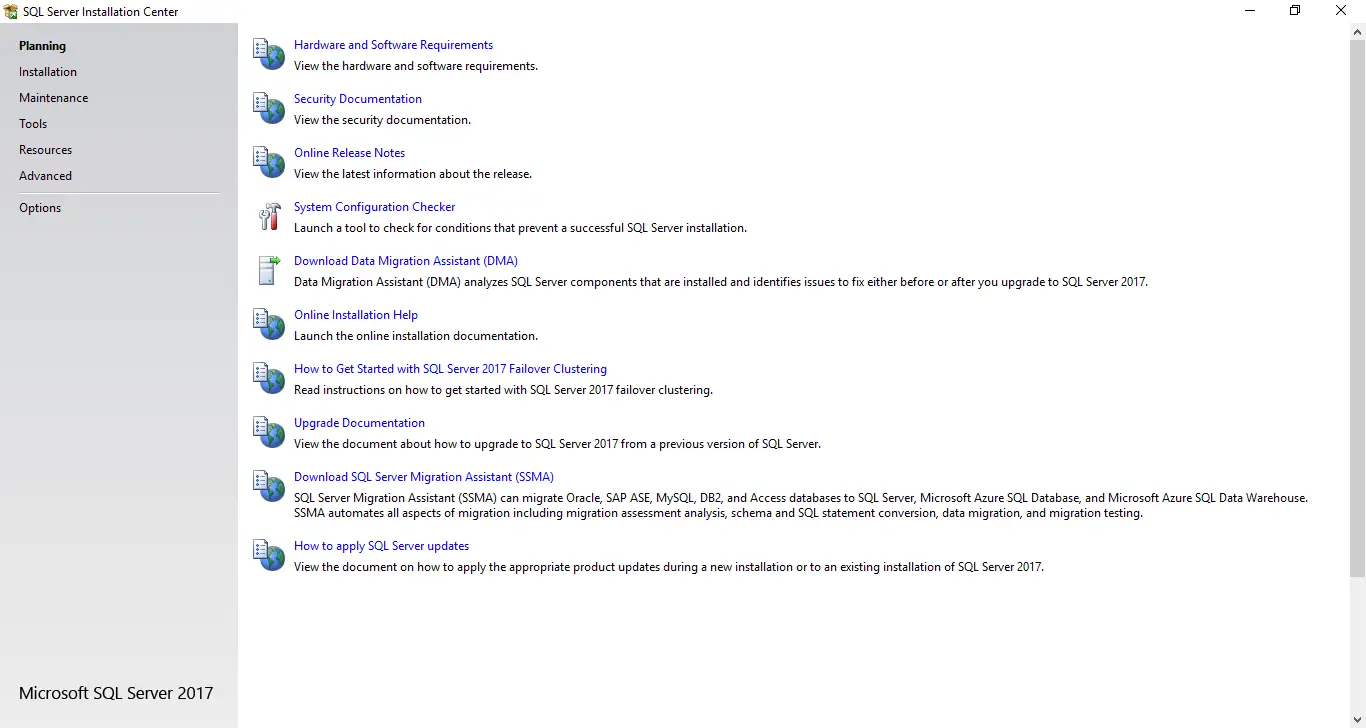
The Installation Center provides a set of screens that guide you through the SQL Server installation process.
Select Installation
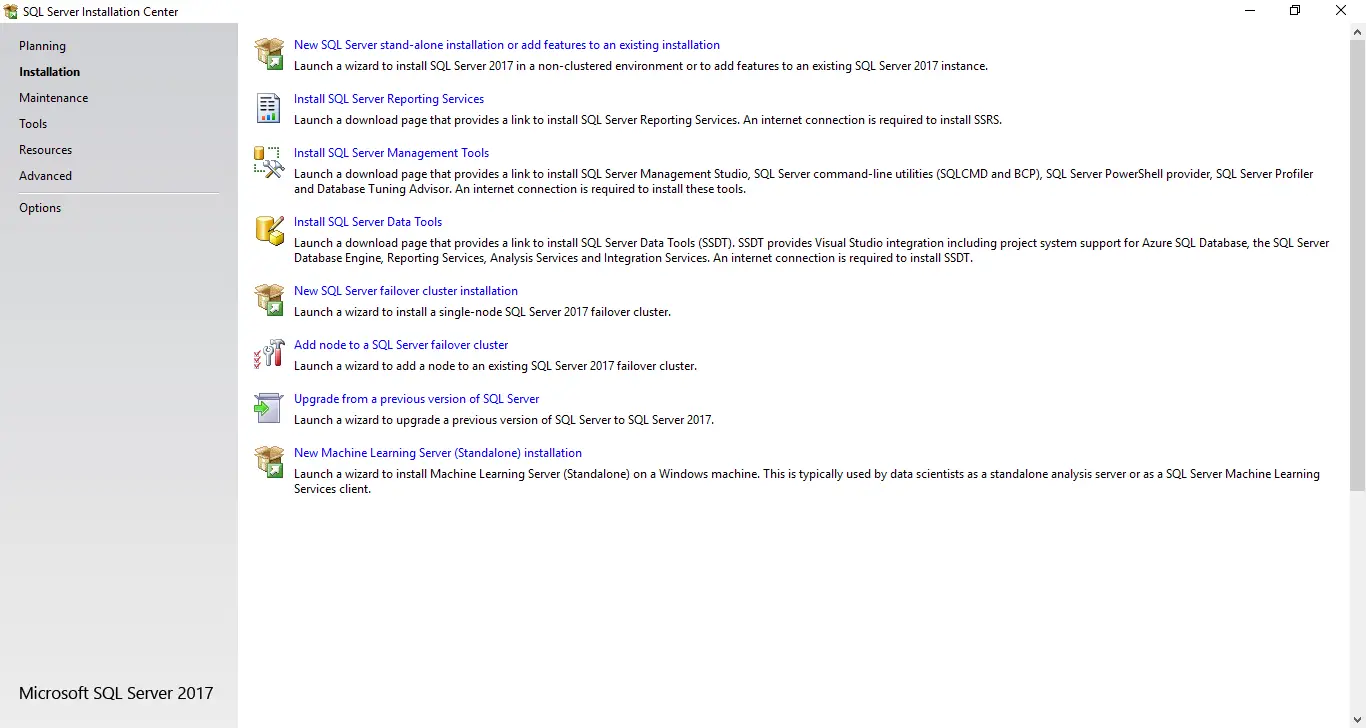
Click on "New SQL Server stand-alone installation or add features to an existing installation" to begin a new installation.
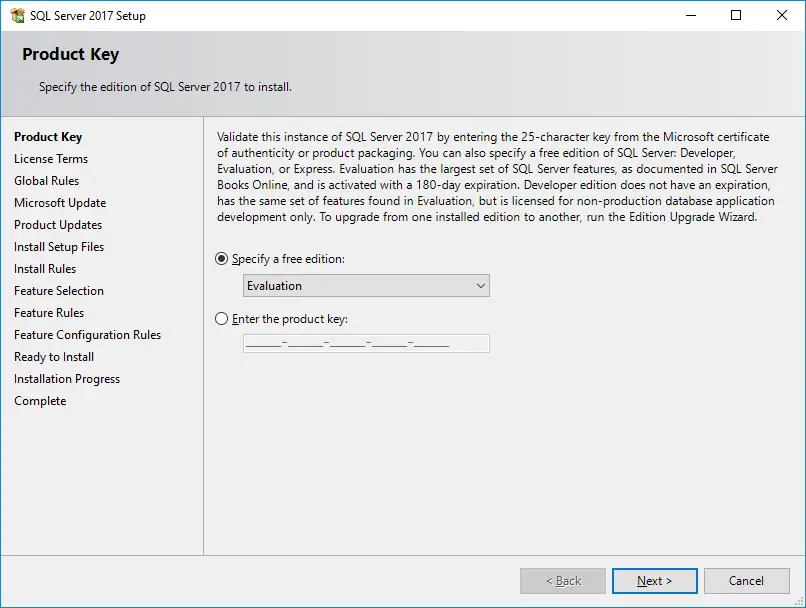
Select the version SQL Server you want to install, then enter your product key if you have one. If not, SQL Server Developer Edition is free and doesn’t require a product key for installation.
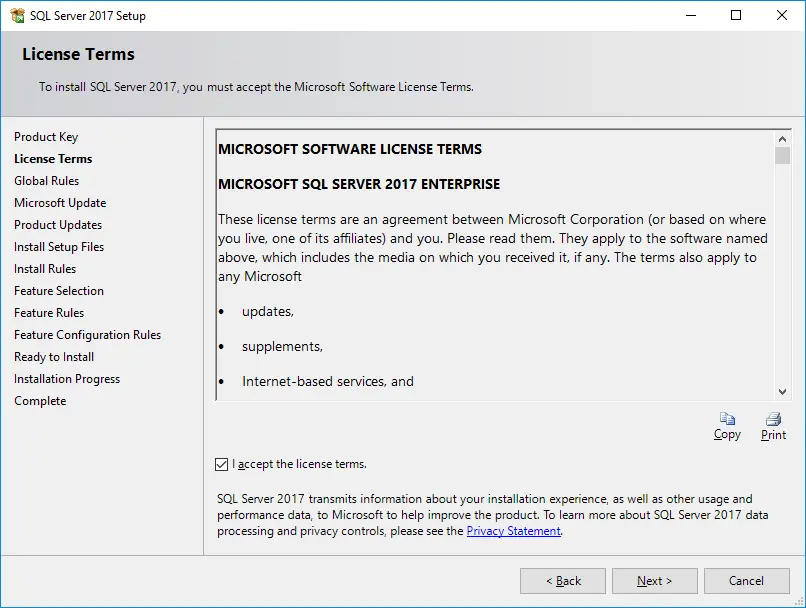
Read and accept the license terms, then check select "I accept the license terms", then click the Next button
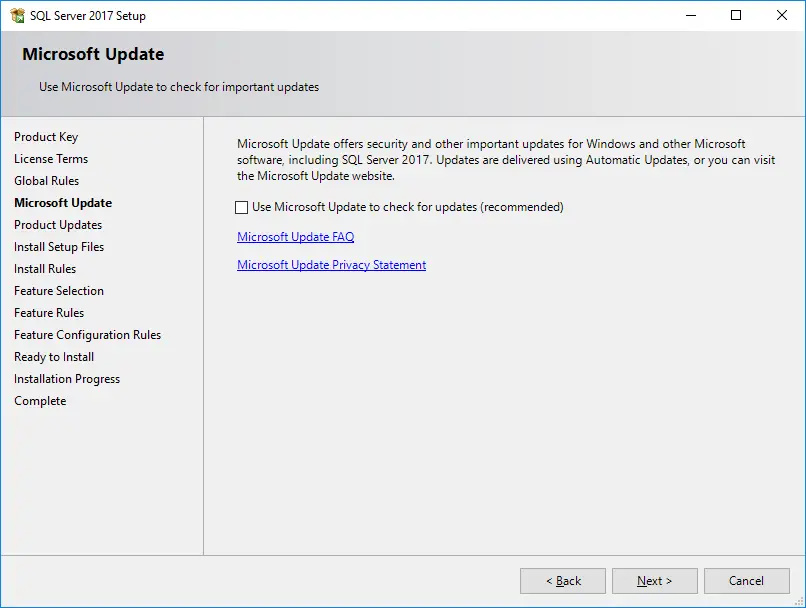
You can check select "Use Microsoft Update to check for update (recommended)", then click the Next button
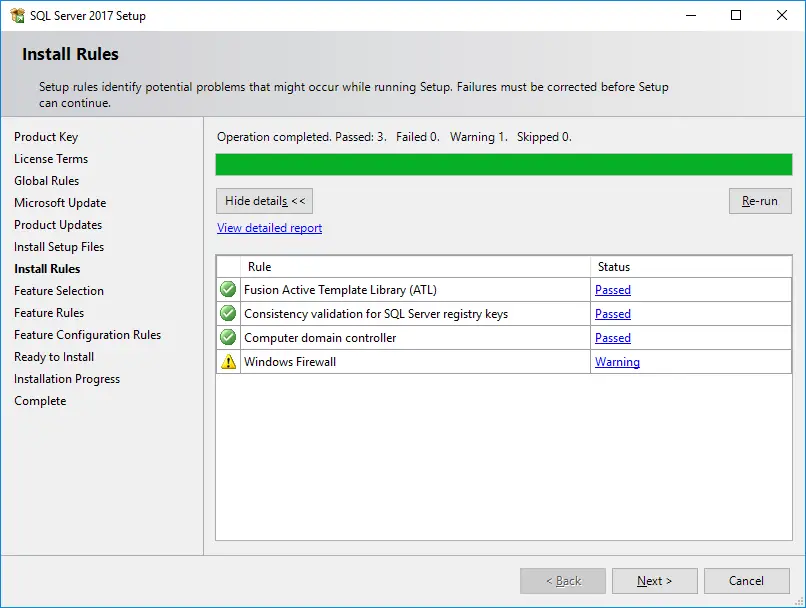
Click Next to continue installation
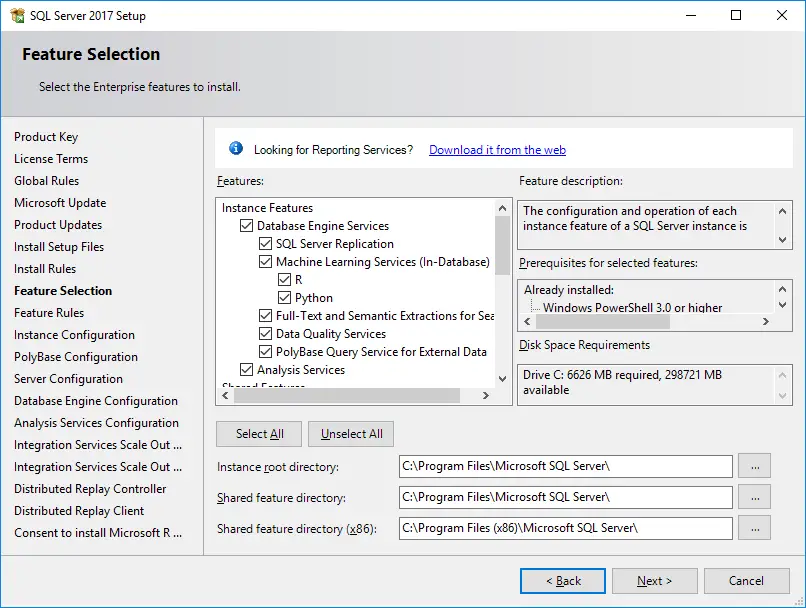
Select the features you want to install. By default, the basic SQL Server Database Engine is selected. You can add additional features like SQL Server Management Tools if needed.
I will click the Select All button, then click the Next button
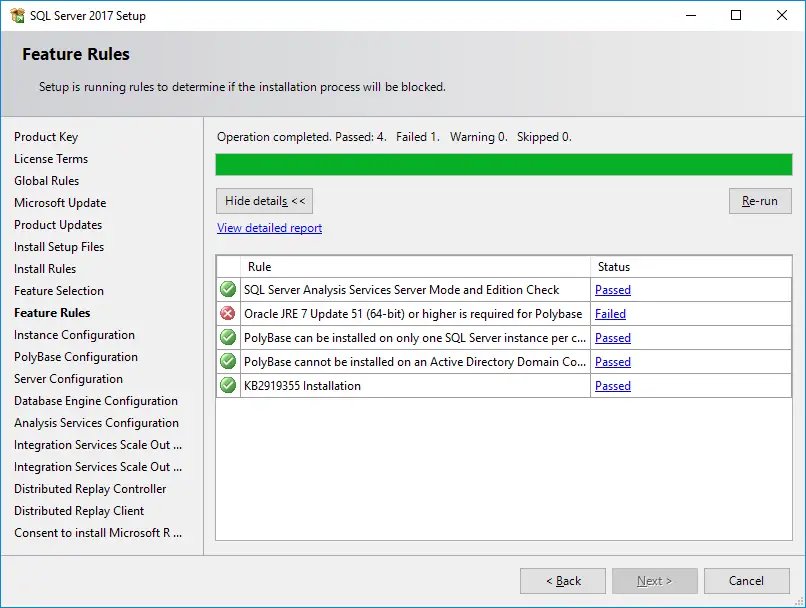
You need to download JRE runtime, then install to your computer. Next, click the Re-run button to check again.
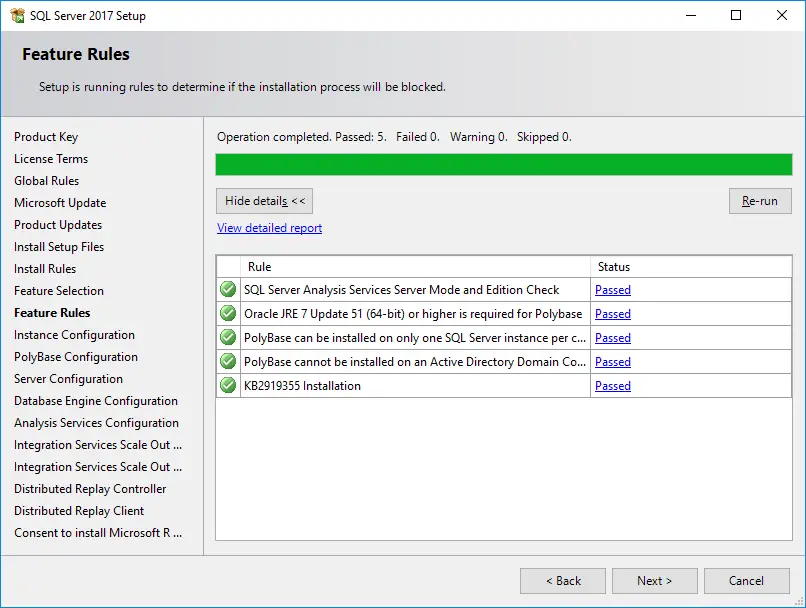
If everything looks good, you can click the Next button to continue
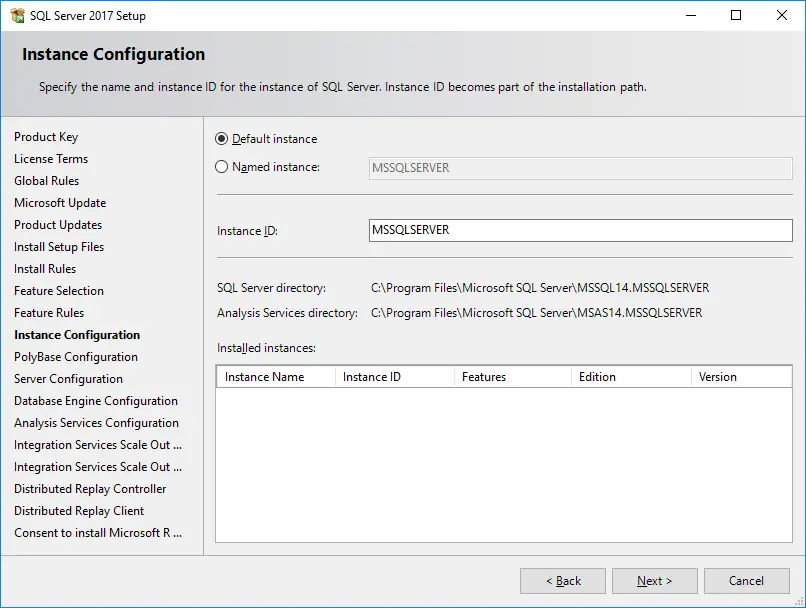
Choose a default instance or a named instance. For most cases, the default instance is sufficient.
You can enter your Instance ID or use the default name, then click the Next button
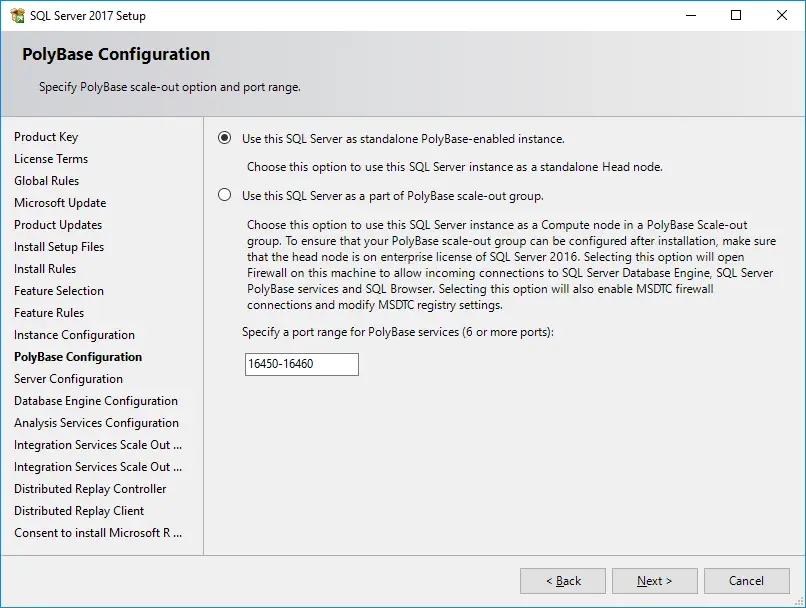
Click the Next button to continue installation
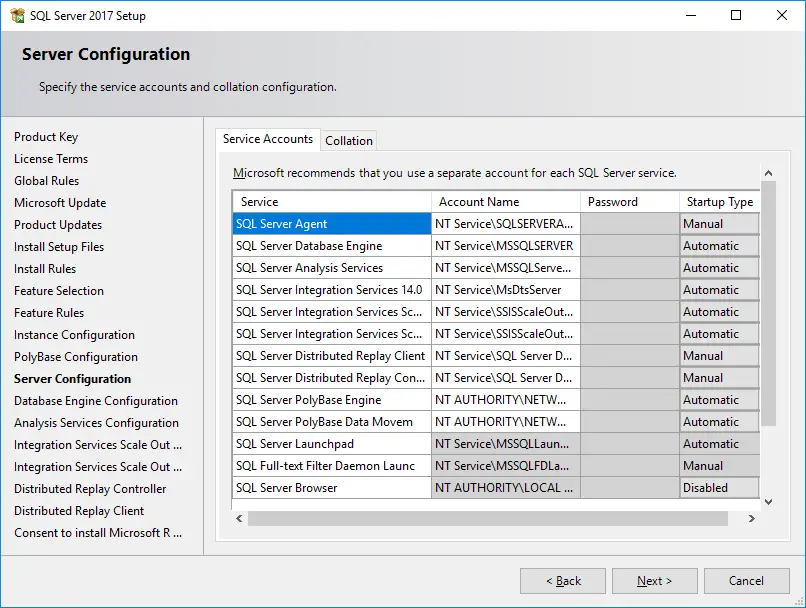
Configure the service accounts and startup type for SQL Server services. You can typically leave these as default unless you have specific requirements.
Click the Next button to continue installation
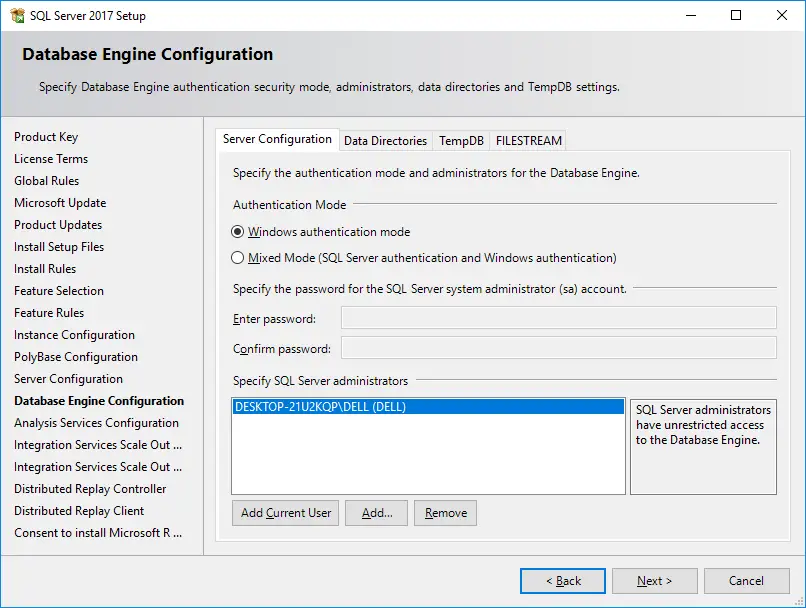
Specify authentication mode (Windows Authentication mode is recommended for better security unless you have specific reasons for mixed mode), add SQL Server administrators (users who have full access to all SQL Server instances), and specify data directories if needed.
You can select mixed mode, then enter sql account.
But I recommend you choose to "Add Current User", then click the Next button
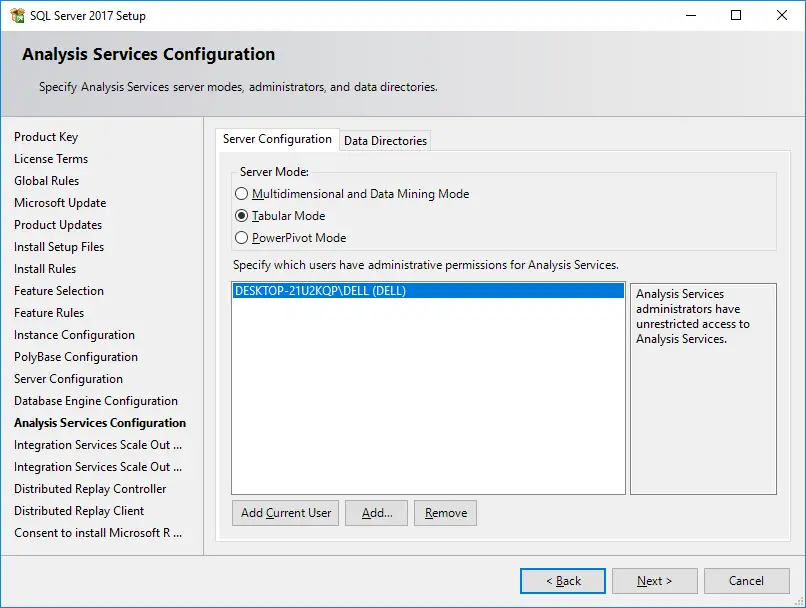
Click "Add Current User" button, then click the Next button
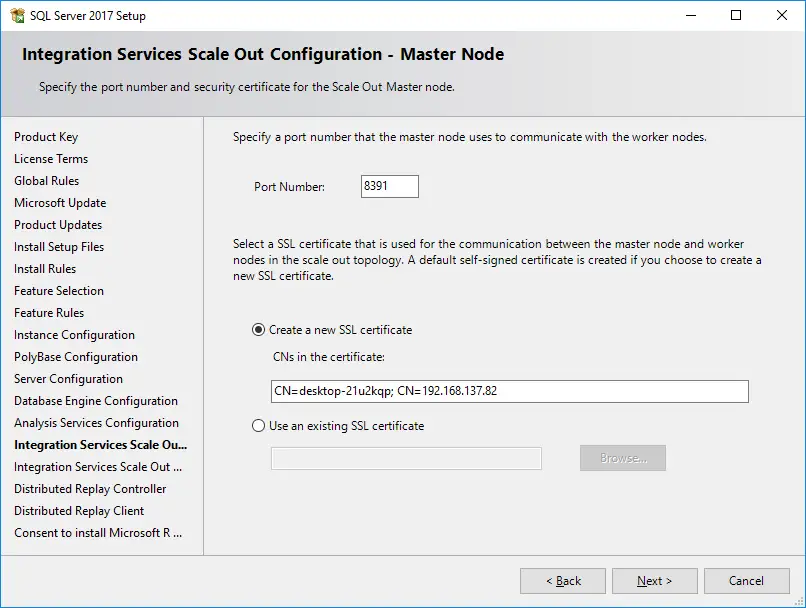
Click the Next button to continue installation
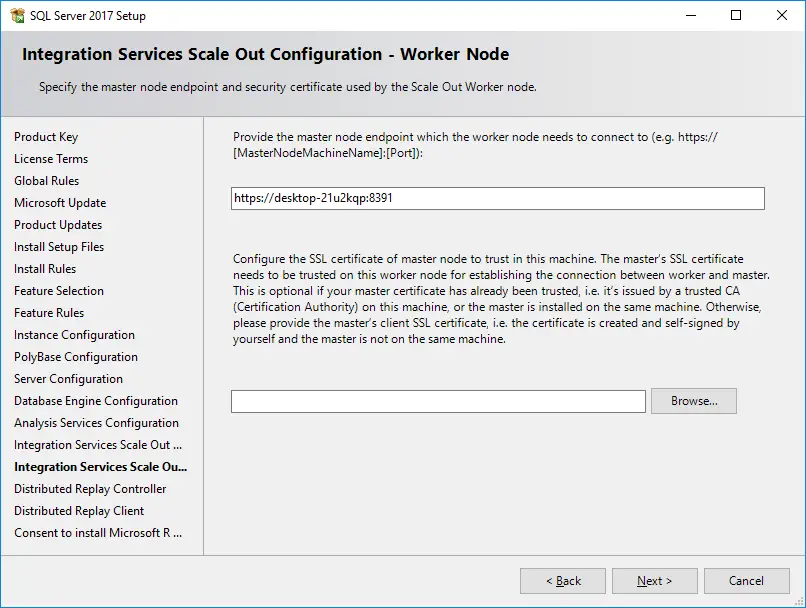
Click the Next button to continue installation
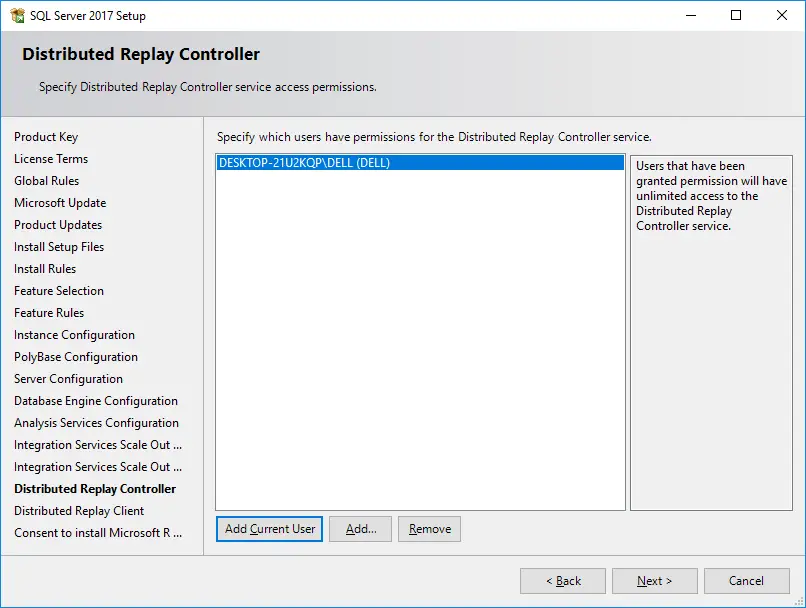
Click "Add Current User" button, then click the Next button to continue installation
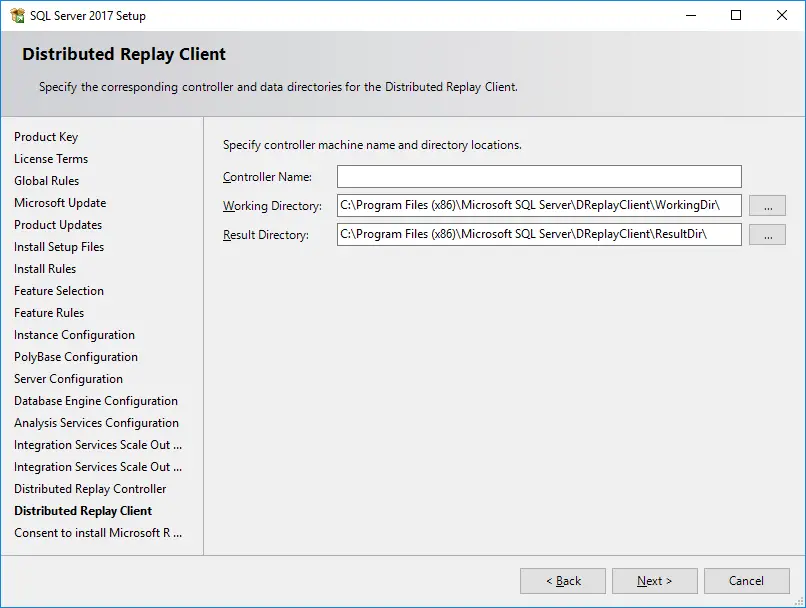
Click the Next button to continue installation
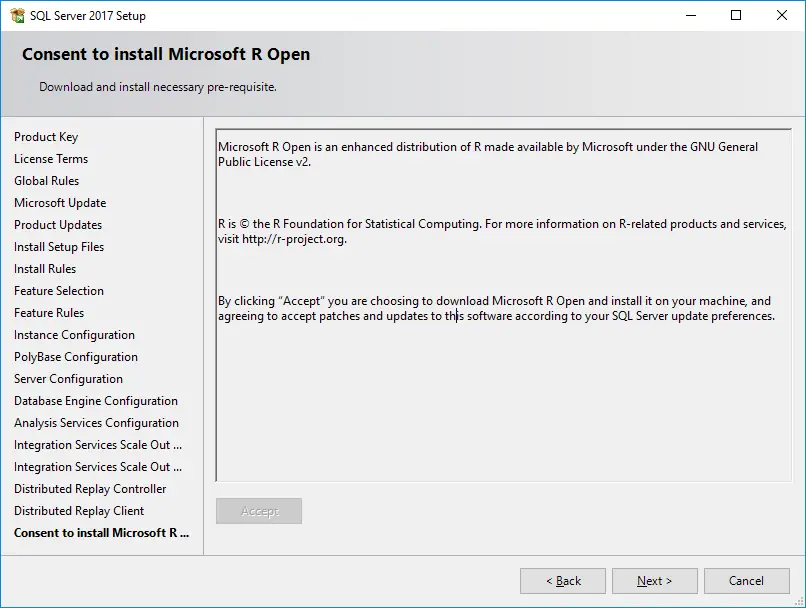
Click Accept button, then click the Next button to continue installation
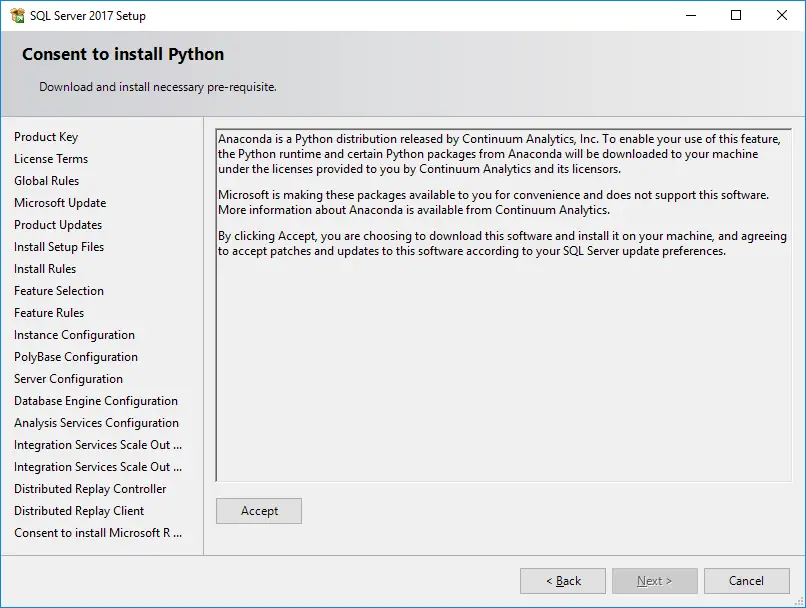
Click Accept button, then click the Next button to continue installation
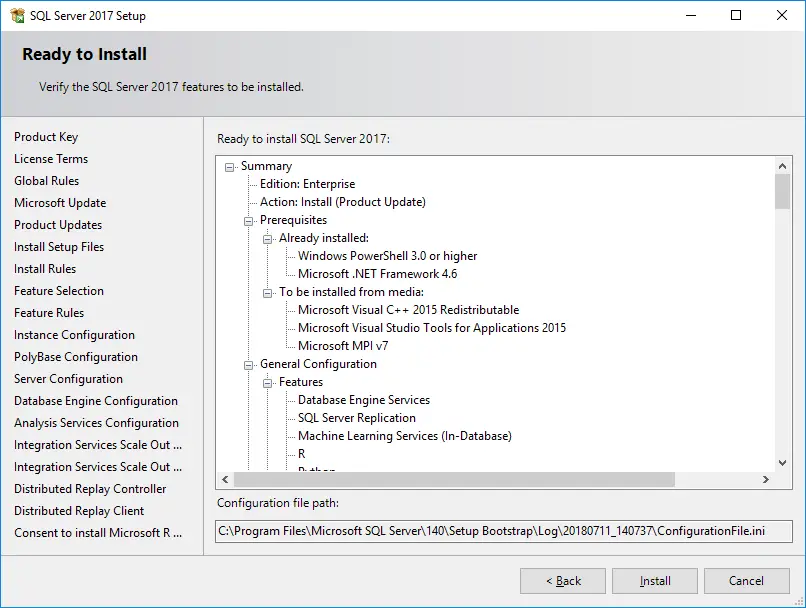
Review the summary of features and configurations. Click "Install" to begin the installation process.
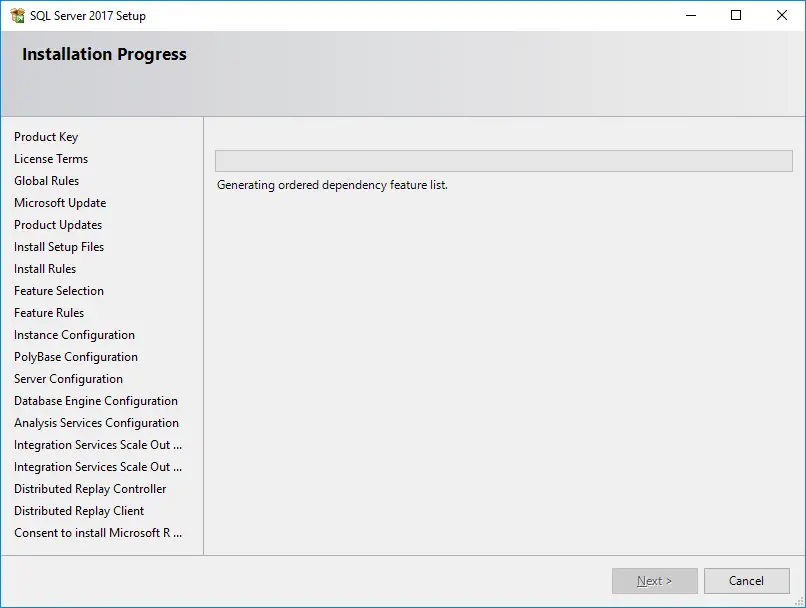
The installer will now install SQL Server and its components. This may take some time depending on your system configuration.
Clic the Next button to complete installation
Once the installation is complete, you'll see a screen indicating the successful installation. Click "Close" to exit the installer.
To check the SQL Server Services, you can open SQL Server Configuration Manager or Services (from Windows Start menu) to ensure that SQL Server services are running.
You can use SQL Server Management Studio (SSMS) or any other SQL client to connect to your SQL Server instance to verify connectivity and functionality.
- How to Download ODBC Driver for SQL Server
- How to Download SQL Server Management Studio (SSMS) Versions
- How to Query JSON in SQL Server
- How to modify JSON in SQL Server
- How to set time to 00:00:00 with GETDATE() in SQL
- How to find all the dependencies of a table in SQL Server
- How to Find Objects Referencing a Table in SQL Server
- Case sensitivity in SQL Server


