How to create and write data to an Excel file in VB.NET
By Tan Lee Published on Jul 13, 2024 14.68K
To create and write data to an Excel file in a VB.NET Windows Forms Application using EPPlus, you'll need to follow these steps.
To create and write data to an Excel file in VB.NET using the EPPlus library, you'll need to follow these steps
Open your Visual Studio, then create a new Windows Forms Application by selecting File=>New=>Project
Next, Select Visual Basic item, then select Windows Forms App (.NET Framework)
After you finish creating the project, you need to open your form designer, then drag and drop Button and DataGridView controls from the Visual Studio toolbox into your form designer.
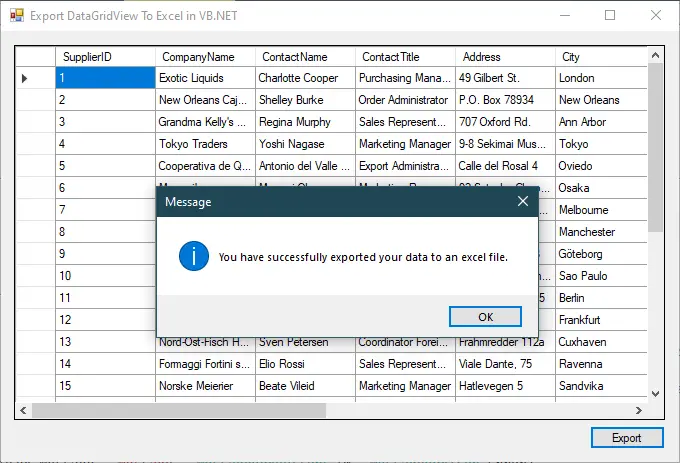
You can design a simple UI that allows you to display data in DataGridView, then export data from DataGridView to excel file in Visual Basic .NET
How to create an Excel file in VB.NET
This is a simple application help you create and write data to excel file in Windows Forms Application VB.NET using EPPlus library.
Right-clicking on your project, then select Manage Nuget Packages.
Selecting the Browse tab, then search for "EPPlus" and install it.

EPPlus is a .NET library that enables developers to read, create, and manipulate Excel spreadsheets programmatically using the C# or VB.NET programming languages. It's a third party library and supports Non-Commercial and Commercial licenses.
epplus license
To configure the license, you can open the App.config file, and then add a configuration license allowing you to use EPPlus as shown below.
<?xml version="1.0" encoding="utf-8"?>
<configuration>
  <appSettings>
    <!--The license context used-->
    <add key="EPPlus:ExcelPackage.LicenseContext" value="NonCommercial" />
  </appSettings>
</configuration>
Or you can also configure the license by writing code.
' If you are a commercial business and have purchased commercial licenses use the static property LicenseContext of the ExcelPackage class :
ExcelPackage.LicenseContext = LicenseContext.Commercial;

' If you use EPPlus in a noncommercial context
ExcelPackage.LicenseContext = LicenseContext.NonCommercial;
Next, Right-click on your project, then add an ADO.NET Entity Data Model to your project. We will use Entity Framework to retrieve data from Northwind database.
If you don't have the Northwind database you can view this post: How to download and restore Northwind database to SQL Server
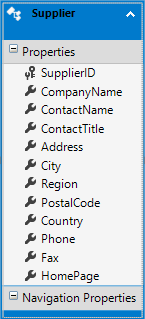
Making a connection to the Northwind database, then select Suppliers table.
After you finish creating an ADO.NET Entity Data Model you will see the diagram as shown below.
Rebuilding your project, then click the arrow icon on the DataGridView and add a DataSource to your DataGridView control.
Opening your form designer, then double click on the form to add a Form_Load event handler allows you to retrieve supplier data from the Northwind database, then display data in DataGridView.
Private Sub Form1_Load(sender As Object, e As EventArgs) Handles MyBase.Load
    Using db As NorthwindEntities = New NorthwindEntities()
        DataGridView.DataSource = db.Suppliers.ToList()
    End Using
End Sub
To use the entity framework to get data from the sql database, you should create a new instance of your model, then simply select the table you want to get data from database.
How to Export data from DataGridView to excel in VB.NET
Add the following import statements at the top of your VB.NET file to import EPPlus namespaces
Imports OfficeOpenXml
Imports OfficeOpenXml.Style
Finally, Add a click event handler to the Export button that allows you to export data from DataGridView to excel file in VB.NET
Create a new Excel package and worksheet, then write data to cells. After writing data to the worksheet, you need to save the Excel file by using the Save method.
'how to Save excel file in vb.net
Private Sub btnExport_Click(sender As Object, e As EventArgs) Handles btnExport.Click
    Using sfd As SaveFileDialog = New SaveFileDialog() With {.Filter = "Excel Workbook|*.xlsx"}
        Try
            If sfd.ShowDialog() = DialogResult.OK Then
               'epplus create excel file
                Dim fileInfo = New FileInfo(sfd.FileName)
                Using excelPackage As ExcelPackage = New ExcelPackage(fileInfo)
                    Dim workSheet As ExcelWorksheet = excelPackage.Workbook.Worksheets.Add("Suppliers")
                    workSheet.Cells.LoadFromCollection(Of Supplier)(TryCast(DataGridView.DataSource, List(Of Supplier)), True)
                    'epplus export to excel
                    excelPackage.Save()
                    MessageBox.Show("You have successfully exported your data to an excel file.", "Message", MessageBoxButtons.OK, MessageBoxIcon.Information)
                End Using
            End If
        Catch ex As Exception
            MessageBox.Show(ex.Message, "Message", MessageBoxButtons.OK, MessageBoxIcon.Error)
        End Try
    End Using
End Sub
You will need to use SaveFileDialog class to open a save file dialog, then use the ExcelPackage class to create an excel sheet.
We will cast data from DataGridView to Supplier of List type and use the LoadFromCollection method to insert data to excel sheet. And don't forget to call the Save method to create and save data to excel file.
You can watch the video below to know how to create and write data to excel file in vb.net windows forms application
VIDEO TUTORIAL
Categories
Popular Posts

Implement security headers for an ASP.NET Core
Jun 24, 2025

Structured Data using FoxLearn.JsonLd
Jun 20, 2025


RuangAdmin Template
Nov 13, 2024

Modular Admin Template
Nov 14, 2024