How to Create Material MessageBox in C#
By Tan Lee Published on Jul 17, 2024 15.74K
How to Create a Material MessageBox in C#
To create a Material Design-style MessageBox in C#, you can utilize third-party libraries like MaterialSkin. Below is an example of how to create a Material Design MessageBox using the MaterialSkin library.
Create a new Windows Forms Application project, then nstall the MaterialSkin library via NuGet Package Manager.
You can do this by running the following command in the Package Manager Console:
Install-Package MaterialSkin
You can also install it from the Visual Stdio by right-clicking on your project, then select Manage NuGet Packages -> Enter 'material skin' at the search box -> install it.
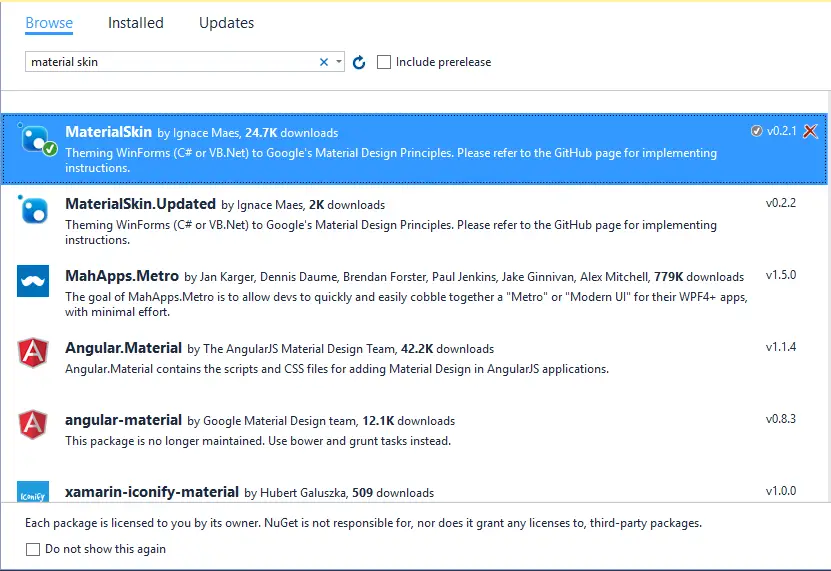
How to create a custom message box in C#?
You can create a custom message box using material skin by creating a new form, then rename it to frmOK
MessageBox OK: frmOK
You can drag and drop the material button, label control from the Visual Studio toolbox into your form designer.
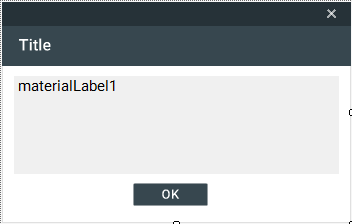
Modify your layout as show above
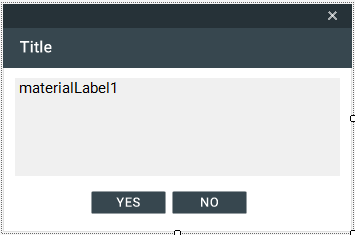
Do the same way for YesNo MessageBox, create a new form then change name to frmYesNo
MessageBox Yes/No: frmYesNo
And the Main Form, i just add 2 material buttons
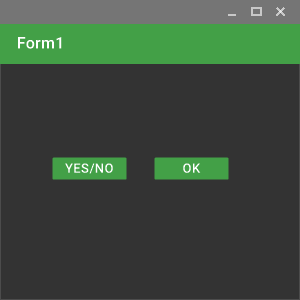
To create a custom message box, i will create a MaterialMessageBox class to handle MessageBox as shown below.
// c# create a custom message box
public static class MaterialMessageBox
{
    public static DialogResult Show(string message, string caption, MessageBoxButtons button)
    {
        DialogResult result = DialogResult.None;
        switch (button)
        {
            case MessageBoxButtons.YesNo:
                using (frmYesNo yesNo = new frmYesNo())
                {
                    yesNo.Text = caption;
                    yesNo.Message = message;
                    result = yesNo.ShowDialog();
                }
                break;
            case MessageBoxButtons.OK:
                using (frmOK ok = new frmOK())
                {
                    ok.Text = caption;
                    ok.Message = message;
                    result = ok.ShowDialog();
                }
                break;
        }
        return result;
    }
}
Open your Main Form, then modify your code as shown below.
To create a material form you need to change the inheritance from Form to MaterialForm
using System.Windows.Forms;
using MaterialSkin;

// message box c#
namespace MaterialMessageBoxDemo
{
   // Form1 class represents the Material Design MessageBox form
    public partial class Form1 : MaterialSkin.Controls.MaterialForm
    {
        MaterialSkin.MaterialSkinManager skinManager;
        public Form1()
        {
            InitializeComponent();
            // c# init skin material form
            skinManager = MaterialSkinManager.Instance;
            skinManager.AddFormToManage(this);
            skinManager.Theme = MaterialSkinManager.Themes.DARK;
            skinManager.ColorScheme = new ColorScheme(Primary.Green600, Primary.Grey600, Primary.Grey900, Accent.LightBlue200, TextShade.WHITE);
        }

        // c# show message box
        private void materialRaisedButton1_Click(object sender, EventArgs e)
        {
            if(MaterialMessageBox.Show("Are you sure want to delete this record?", "Message", MessageBoxButtons.YesNo) == DialogResult.Yes)
            {
                //
            }
        }

        private void materialRaisedButton2_Click(object sender, EventArgs e)
        {
            MaterialMessageBox.Show("Thank you for watching this video !", "Message", MessageBoxButtons.OK);
        }
    }
}
This code will create a Material Design-style MessageBox with a specified message, title, and buttons. You can extend it further to handle different types of MessageBox buttons or customize its appearance according to your needs.


