How to Create a custom Message Box in C#
By Tan Lee Published on Jul 16, 2024 58.57K
To customize a message box in C#, you can use the built-in MessageBox class or create a custom dialog using a Form.
Why Use Custom Buttons in C# MessageBox?
The default MessageBox in C# only offers a predefined set of buttons, such as OK, Cancel, Yes, No, etc. Sometimes, your application might need specific buttons with custom labels or actions.
Creating a custom message box gives you the flexibility to:
- Design your message box with any number of buttons.
- Use custom button labels that better match your application’s tone.
- Customize the layout and behavior of the buttons.
In this article, we will walk through how to create a custom message box in C# using Windows Forms, providing you with the ability to fully control the appearance and functionality of your message dialogs.
How to customize a message box in C#?
In C#, you can create a custom message box by creating your own form with customized buttons, icons, and message content.
First, Open your Visual Studio, then click New Project. Next, Select Visual C# on the left, then Windows and then select Windows Forms Application. Enter your project name and then click OK button.
For this example, we'll use two buttons on the main form. You can design your form using the Visual Studio Designer.
Drag and drop two Button controls from the Visual Toolbox, then design your form as shown below.
Form1

C# Windows Form Message Box
Next, we will begin creating custom message boxes.
In this example, we will create two types of message boxes:
- MessageBox with OK Button
- MessageBox with Yes/No Button
For example: MessageBox with OK button and MessageBox with YesNo button. You can do the same for other custom message boxes.
Creating a custom message box allows you to easily increase the size of message box in c#.
Create two forms:
frmMessageOKfor displaying a message with an OK button.frmMessageYesNofor displaying a message with Yes/No buttons.
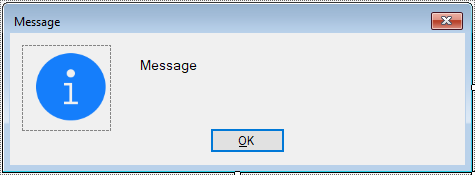
C# MessageBox OK
For example, frmMessageOK is a c# message box with custom buttons and c# messagebox size
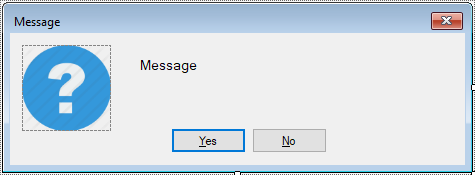
C# MessageBox YesNo
For example, frmMessageYesNo is a c# messagebox custom buttons.
C# MessageBox Font Size
In C#, the default MessageBox does not directly allow you to change the font size of the text it displays. However, with a custom message box, you can easily change the font size, color of the title, and button text in the designer.
C# Custom message box
To make it reusable, we will create a static class MyMessageBox that handles showing custom message boxes. This class will check which button types (OK or Yes/No) need to be displayed and show the corresponding custom form.
// custom c# messagebox message
public static class MyMessageBox
{
    // c# messagebox custom box
    public static System.Windows.Forms.DialogResult ShowMessage(string message, string caption, System.Windows.Forms.MessageBoxButtons button, System.Windows.Forms.MessageBoxIcon icon)
    {
        System.Windows.Forms.DialogResult dlgResult = System.Windows.Forms.DialogResult.None;
        // c# message box custom buttons
        // check which button configuration to use the custom messagebox c#
        switch (button)
        {
            case System.Windows.Forms.MessageBoxButtons.OK:
                using (frmMessageOK msgOK = new frmMessageOK()) // c# messagebox custom buttons
                {
                    // Set the caption, message, and icon based on user input
                    msgOK.Text = caption;
                    msgOK.Message = message;
                    switch (icon)
                    {
                        case System.Windows.Forms.MessageBoxIcon.Information:
                            msgOK.MessageIcon = CustomMessageBox.Properties.Resources.Information;
                            break;
                        case System.Windows.Forms.MessageBoxIcon.Question:
                            msgOK.MessageIcon = CustomMessageBox.Properties.Resources.Question;
                            break;
                    }
                    dlgResult = msgOK.ShowDialog();
                }
                break;
            case System.Windows.Forms.MessageBoxButtons.YesNo:
                using (frmMessageYesNo msgYesNo = new frmMessageYesNo())
                {
                    msgYesNo.Text = caption;
                    msgYesNo.Message = message;
                    switch (icon)
                    {
                        case System.Windows.Forms.MessageBoxIcon.Information:
                            msgYesNo.MessageIcon = CustomMessageBox.Properties.Resources.Information;
                            break;
                        case System.Windows.Forms.MessageBoxIcon.Question:
                            msgYesNo.MessageIcon = CustomMessageBox.Properties.Resources.Question;
                            break;
                    }
                    dlgResult = msgYesNo.ShowDialog();
                }
                break;
        }
        return dlgResult;
    }
}
Now, go to your Form1 and add event handlers for the buttons to show the custom message boxes.
For example, how to customize message box in c#
Form1
using System;
using System.Collections.Generic;
using System.ComponentModel;
using System.Data;
using System.Drawing;
using System.Linq;
using System.Text;
using System.Threading.Tasks;
using System.Windows.Forms;

// how to customize message box in c#
namespace CustomMessageBox
{
    public partial class Form1 : Form
    {
        public Form1()
        {
            InitializeComponent();
        }

        // message box c#
        private void button1_Click(object sender, EventArgs e)
        {
            // Show the custom message box with an OK button
            MyMessageBox.ShowMessage("Hello world !", "Message", MessageBoxButtons.OK, MessageBoxIcon.Information);
        }

        // c# messagebox custom buttons
        private void button2_Click(object sender, EventArgs e)
        {
            // Show the custom message box with Yes/No buttons
            if(MyMessageBox.ShowMessage("Are you sure want to delete this record ?", "Message", MessageBoxButtons.YesNo, MessageBoxIcon.Question) == DialogResult.Yes)
            {
                // Show confirmation of deletion
                MyMessageBox.ShowMessage("Yes !", "Message", MessageBoxButtons.OK, MessageBoxIcon.Information);
            }
            else
                MyMessageBox.ShowMessage("No !", "Message", MessageBoxButtons.OK, MessageBoxIcon.Information);
        }
    }
}
In each form, add a Label control for the message text and a PictureBox for the icon.
Open your frmMessageOK form, then add MessageIcon and Message properties to your form allows you to set icon and message to your custom message box.
Here’s how you can implement the frmMessageOK form:
C# Custom MessageBox
frmMessageOK
// c# custom dialog box example
public partial class frmMessageOK : Form
{
// c# msgbox constructor
public frmMessageOK()
{
InitializeComponent();
}
// Property to set and get the message icon
public Image MessageIcon
{
get { return pictureBox.Image; }
set { pictureBox.Image = value; }
}
// Property to set and get the message text
public string Message
{
get { return lblMessage.Text; }
set { lblMessage.Text = value; }
}
}Similarly, implement the frmMessageYesNo form.
frmMessageYesNo
// c# custom message box
public partial class frmMessageYesNo : Form
{
    // c# msgbox constructor
    public frmMessageYesNo()
    {
        InitializeComponent();
    }

    public Image MessageIcon
    {
        get { return pictureBox.Image; }
        set { pictureBox.Image = value; }
    }

    public string Message
    {
        get { return lblMessage.Text; }
        set { lblMessage.Text = value; }
    }
}
This example demonstrates how to customize the appearance and behavior of a message box in C# by modifying the MyMessageBox class. You can easily adjust the size, font, and color of the message box, making it a better option than using the default message box.
By following the steps outlined in this article, you can easily create your own message box with custom buttons and enhance the overall user experience of your C# Windows Forms applications.
VIDEO TUTORIAL
Categories
Popular Posts

Implement security headers for an ASP.NET Core
Jun 24, 2025

Structured Data using FoxLearn.JsonLd
Jun 20, 2025


Horizon MUI Admin Dashboard Template
Nov 18, 2024
