How to Insert Update Delete From Database in VB.NET
By Tan Lee Published on Jul 16, 2024 35.54K
Performing Insert, Update, and Delete operations in a VB.NET WinForms application using Entity Framework involves several steps.
Here’s a basic guide to get you started.
To create a simple CRUD in VB.NET using Entity Framework, you can drag and drop the TextBox, Button, Label and DataGridView controls from the Visual Studio toolbox to your winform, then you can layout your UI as shown below.

Through this example, you will learn how to implement CRUD functionality with the Entity Framework in VB.NET.
Create your Entity Data Model (EDM) using Entity Framework by right-clicking on your project, then select Add->New Item->ADO.NET Entity Data Model.
Adding a new item to your project (ADO.NET Entity Data Model). Choosing whether to generate from an existing database, code first, or empty model (based on your application needs).
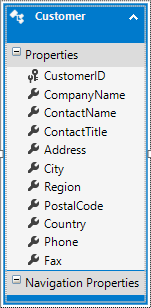
We will use Northwind database to play demo, so you need to select the Northwind database, then select the Customer table.
Assuming you have your Entity Data Model set up (NorthwindEntities in this example), you can then perform CRUD operations.
You should add a bindingsource to the Customer class, then add the data binding to the TextBox and DataGridView controls.
Next, Declare the db variable allows you to access the DbContext.
Private db As NorthwindEntities
Adding the load event handler to your form allow you to load the customer table into the DataGridView control.
Private Sub Form1_Load(sender As Object, e As EventArgs) Handles MyBase.Load
    db = New NorthwindEntities()
    db.Customers.Load()
    CustomerBindingSource.DataSource = db.Customers.Local
End Sub
Adding the click event handler to the Add button allow you to add new customer object.
Private Sub btnAdd_Click(sender As Object, e As EventArgs) Handles btnAdd.Click
    CustomerBindingSource.AddNew()
End Sub
Next, Add the click event handler to the Delete button allows you to remove the customer object from the bindingsource.
Private Sub btnDelete_Click(sender As Object, e As EventArgs) Handles btnDelete.Click
    If MessageBox.Show("Are you sure want to delete this records?", "Message", MessageBoxButtons.YesNo, MessageBoxIcon.Question) = DialogResult.Yes Then
        CustomerBindingSource.RemoveCurrent()
    End If
End Sub
To save data into sql database, you only need to call the SaveChanges method.
Private Sub btnUpdate_Click(sender As Object, e As EventArgs) Handles btnUpdate.Click
    db.SaveChanges()
    MessageBox.Show("Your data has been successfully saved !", "Message", MessageBoxButtons.OK, MessageBoxIcon.Information)
End Sub
Finally, Add the click event handler to the Cancel button allow you to restore the customer object state as the following vb.net code.
Private Sub btnCancel_Click(sender As Object, e As EventArgs) Handles btnCancel.Click
    Dim changed = db.ChangeTracker.Entries().Where(Function(x) x.State <> EntityState.Unchanged).ToList()
    For Each obj In changed
        Select Case obj.State
            Case EntityState.Modified
                obj.CurrentValues.SetValues(obj.OriginalValues)
                obj.State = EntityState.Unchanged
            Case EntityState.Added
                obj.State = EntityState.Detached
            Case EntityState.Deleted
                obj.State = EntityState.Unchanged
        End Select
    Next
    CustomerBindingSource.ResetBindings(False)
End Sub
And don't forget to dispose your db variable when closing your windows forms application.
Private Sub Form1_FormClosing(sender As Object, e As FormClosingEventArgs) Handles MyBase.FormClosing
    db.Dispose()
End Sub
Press F5 to build and run your project, So you have learned how to add, edit, delete data in sql database using vb.net programming language.
VIDEO TUTORIAL
- How to Insert Update Delete View and Search data from SQL Server in C#
- How to Insert Update Delete data in Database from DataGridView in C#
- How to Insert Update Delete View data in SQL Server using 3 Tiers in C#
- How to Insert Update Delete Select in SQL Server in C#
- How to Insert Update Delete Search data from local database in C#
- How to Insert Update Delete View and Search data from MS Access in C#
- How to Insert Update Delete and View data from SQL Database using NPoco ORM in C#
- Insert Update Delete and View data from SQL Database using ORM Lite in C#
Categories
Popular Posts

Structured Data using FoxLearn.JsonLd
Jun 20, 2025

Implement security headers for an ASP.NET Core
Jun 24, 2025

Modular Admin Template
Nov 14, 2024

SB Admin Template
Nov 14, 2024

Carpatin Admin Dashboard Template
Nov 15, 2024