How Delete multiple Rows from DataGridView based on CheckBox selection in C#
By Tan Lee Published on Jul 25, 2017 9.31K
This article walks you through a simple example where you can delete selected rows in a DataGridView and save the changes back to the database using Entity Framework.
How to Use Checkboxes to Delete Multiple Rows in DataGridView in C#?
Open Visual Studio, then click New Project, then select Visual C# on the left, then Windows and then select Windows Forms Application. Name your project "DeleteSelectedValue" and then click OK
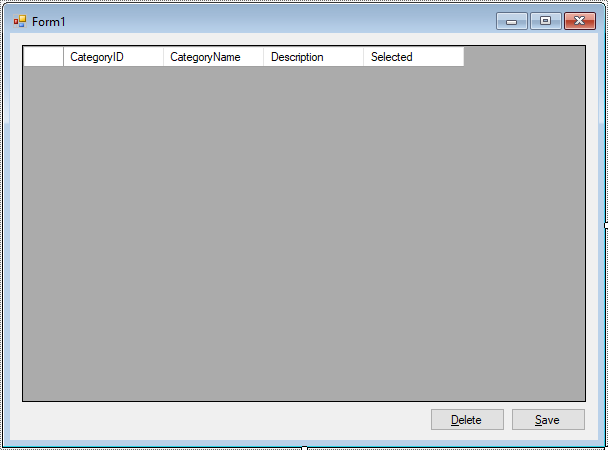
Drag and drop the DataGridView from the Visual Toolbox onto your form designer, then design your form as shown below.
Create an Entity Framework Model, then select category table from Northwind database
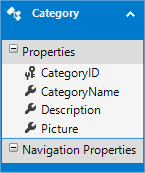
In the Form1_Load method, we initialize the db variable and bind the Category table from the database to the DataGridView. We use the categoryBindingSource to manage data binding and loading the list of categories into the DataGridView.
private void Form1_Load(object sender, EventArgs e)
{
    // Initialize the database context
    db = new TestEntities();
    // Bind the categories to the DataGridView
    categoryBindingSource.DataSource = db.Categories.ToList();
}
This ensures that the DataGridView displays all categories when the form loads.
The btnDelete_Click method handles the deletion of selected rows.
private void btnDelete_Click(object sender, EventArgs e)
{
    // Count the number of selected rows
    int total = dataGridView.Rows.Cast<DataGridViewRow>().Where(p => Convert.ToBoolean(p.Cells["Selected"].Value) == true).Count();
    // If rows are selected, prompt the user for confirmation
    if (total > 0)
    {
        string message = $"Are you sure want to delete {total} row?";
        if (total > 1)
            message = $"Are you sure want to delete {total} rows";
        if (MessageBox.Show(message, "Message", MessageBoxButtons.YesNo, MessageBoxIcon.Question) == DialogResult.Yes)
        {
            // Iterate through the rows in reverse order to avoid index issues when deleting
            for (int i = dataGridView.RowCount - 1; i >= 0; i--)
            {
                DataGridViewRow row = dataGridView.Rows[i];
                // If the row is selected, remove it from the database and DataGridView
                if (Convert.ToBoolean(row.Cells["Selected"].Value) == true)
                {
                    db.Categories.Remove((Category)row.DataBoundItem);
                    categoryBindingSource.RemoveAt(row.Index);
                }
            }
        }
    }
}
If the user confirms, the method removes the corresponding Category objects from the db.Categories collection and also removes the rows from the categoryBindingSource, which automatically updates the DataGridView.
The btnSave_Click method commits the changes using Entity Framework's SaveChangesAsync() method. Since saving is an asynchronous operation, we use the async keyword for the method and await to ensure the operation completes before proceeding.
private async void btnSave_Click(object sender, EventArgs e)
{
    // End editing of the data source
    categoryBindingSource.EndEdit();
    // Save changes to the database asynchronously
    await db.SaveChangesAsync();
    // Inform the user that the data has been saved
    MessageBox.Show("Your data has been successfully saved.", "Message", MessageBoxButtons.OK, MessageBoxIcon.Information);
}
After the user deletes rows, they can click the btnSave button to save the changes to the database.
Add code to handle your form as shown below.
using System;
using System.Collections.Generic;
using System.ComponentModel;
using System.Data;
using System.Drawing;
using System.Linq;
using System.Text;
using System.Threading.Tasks;
using System.Windows.Forms;

namespace DeleteSelectedValue
{
    public partial class Form1 : Form
    {
        public Form1()
        {
            InitializeComponent();
        }

        TestEntities db;
    }
}
In the DataGridView, you’ll need to have a checkbox column ("Selected") so users can select rows for deletion. The column should be of type DataGridViewCheckBoxColumn. When the user selects the checkboxes, those rows are considered for deletion when the Delete button is pressed.
This article demonstrated how to implement row deletion functionality in a Windows Forms application using Entity Framework. By binding the DataGridView to a collection from the database, checking the selected rows, and performing deletion and save operations with Entity Framework.
VIDEO TUTORIAL
- How to Open and Show a PDF file in C#
- How to Get all Forms and Open Form with Form Name in C#
- How to zoom an image in C#
- How to Print a Picture Box in C#
- How to update UI from another thread in C#
- How to Search DataGridView by using TextBox in C#
- How to read and write to text file in C#
- How to save files using SaveFileDialog in C#


